Weekend breakfasts are the best because there’s more time to make things like my caramelized apple oven pancake. It only takes 30 minutes and boy, is it good! You need a 9-inch cast iron skillet and lots of apples. I use two huge apples, weighing 1/2 pound each and I’ve used both Granny Smith and gala, cut into 1-inch chunks. There’s more apple than pancake in this delicious breakfast but that’s a good thing.
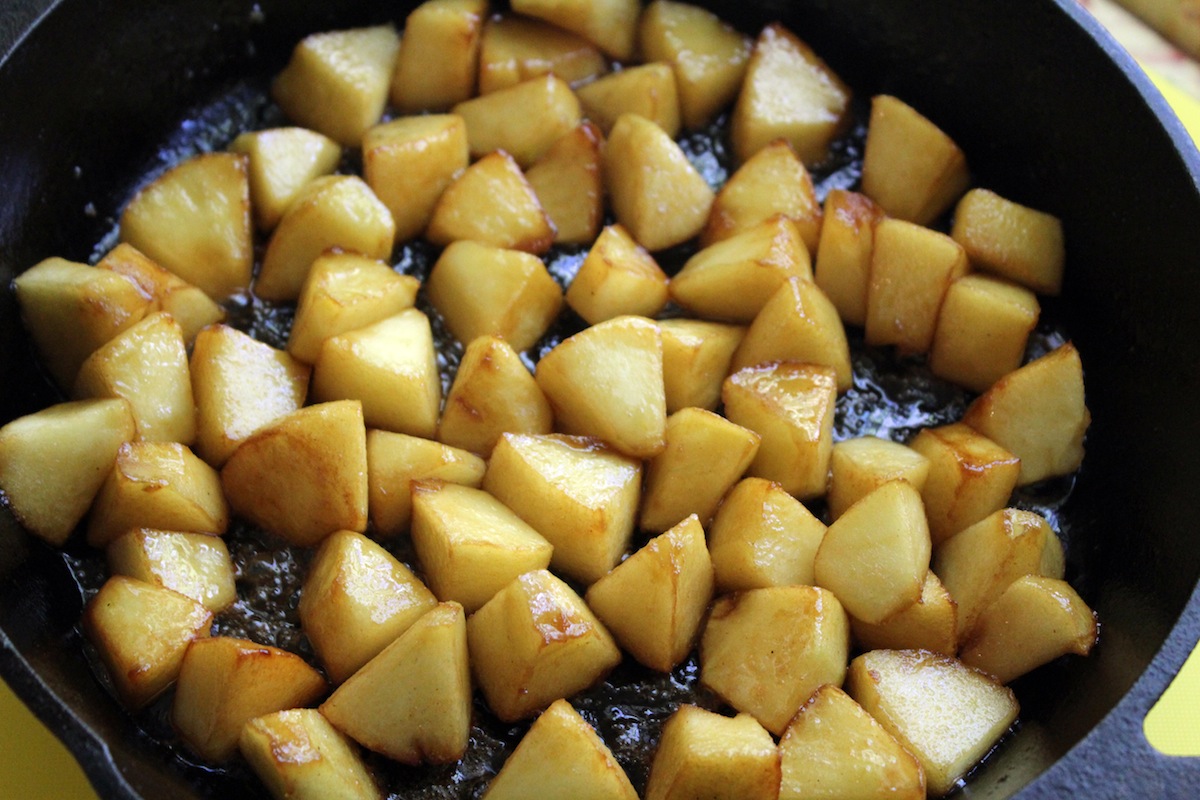
First you melt a little butter and brown sugar in the skillet and cook the apples on the stove top over medium-high heat for about 5 minutes until they get caramelized. After 5 minutes, they should look like this.
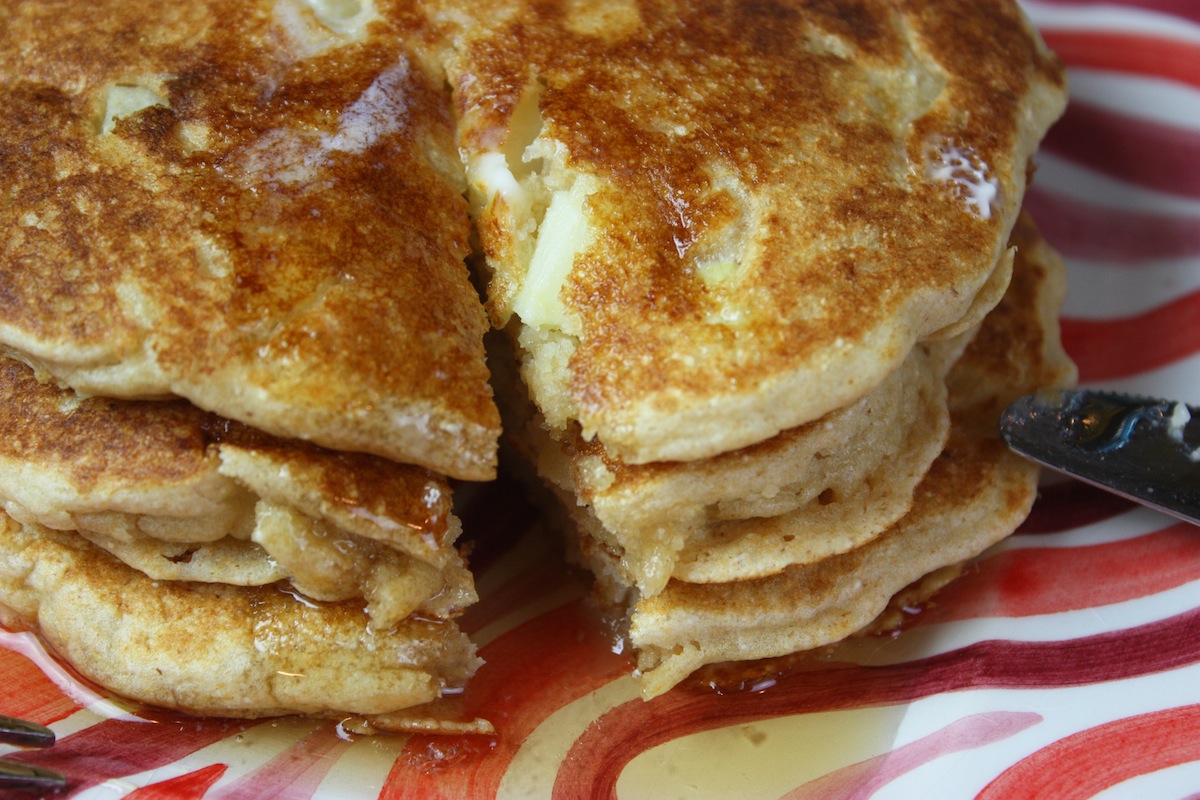
Now you just pour the batter right on top of the apples. The batter is really light and super easy, made with milk, eggs, and flour basically and you just whisk it by hand – no mixer. As soon as the batter is added, using an oven glove, you put the hot pan in the oven (preheated to 400 degrees F) and fifteen minutes later, it’s done. Then you carefully, with oven gloves, invert in onto a big serving plate and it will look like this…
The edges of the pancake are caramelized just like the apples, which are soft and sticky sweet. You don’t need any topping like syrup but you can sprinkle it with a dusting of powdered sugar if you like. If this is all you’re eating, it will serve two but if you have some eggs and toast and this on the side, it will serve four. And if you’re starving and you make this easy apple pancake, someone I know actually ate the whole thing in one sitting. It wasn’t me. That’s my story and I’m sticking to it. Click here for the recipe. – Jenny Jones
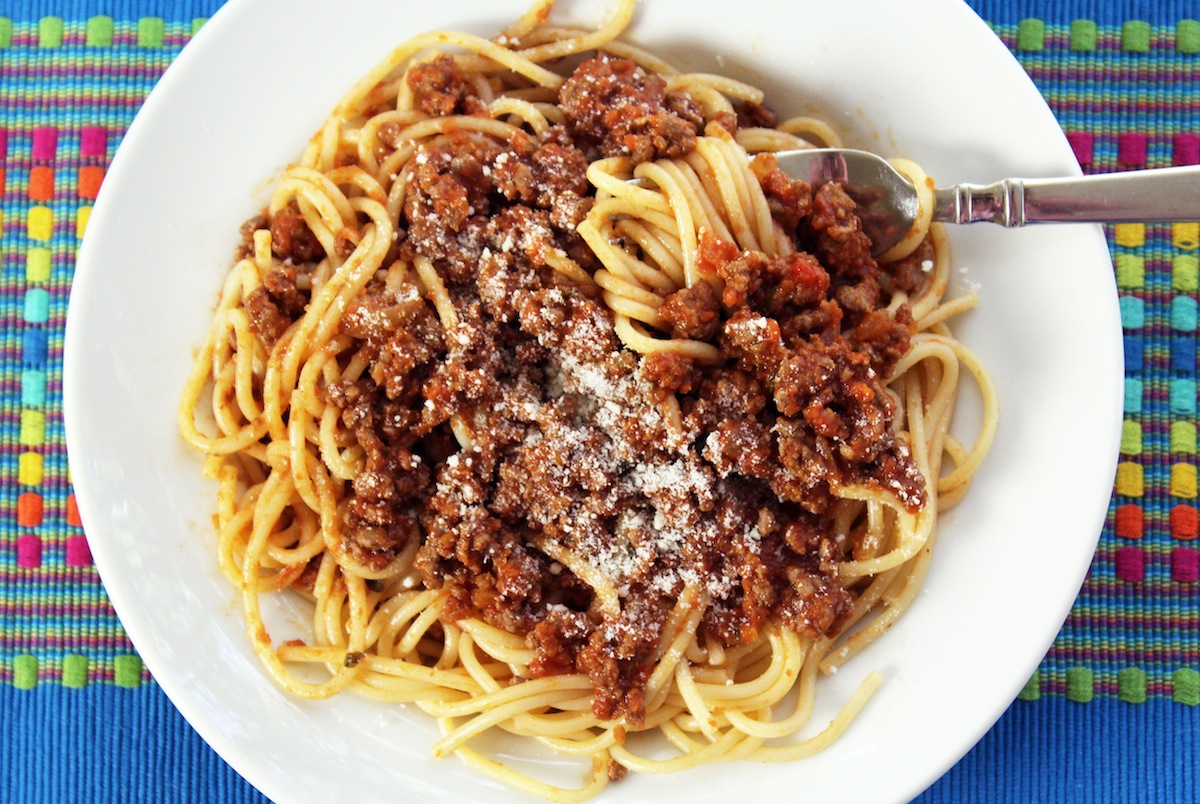
I’m spoiling myself by creating so many quick and easy recipes that I’m no longer willing to take all day to make a good meat sauce. So I changed my recipe from 2 1/4 hours to 45 minutes and now I’ve decided even that was too long. So I just posted a new, simpler, faster recipe for a delicious meat sauce and here’s the best part: Thirty minutes! And it’s delicious!
I didn’t give up any flavor with my new meat sauce recipe. Mainly, I eliminated the carrots, the celery, and the extra liquid which needed all that cooking time. I love the new simple meat sauce. It leaves me time to make my homemade gnocchi to have with it. This recipe is perfect for beginners with simple ingredients and hardly any work. Click here for the new recipe.- Jenny Jones
When they say dark chocolate is good for you they mean dark. Like 70% dark. So that’s what I put in my easy fudge brownies. I start by melting a dark chocolate bar and it makes the most intense brownie! With no butter! And wait ’til you see how easy this recipe is. Dark chocolate bars are available in most grocery stores and they sell them at World Market (they’re cheaper there). To get health benefits, it should have at least 70% cacao.You can find bars from 68 to 72% that will work great but I try to keep it at 70-72%. I’ve used Scharffen Berger and World Market brand and there’s no difference in the end result.
Here is what I learned making these delicious brownies: You do not need butter to make rich-tasting, gooey, fudgy brownies and baking without butter is always my priority. (You can use melted butter in place of the oil if you like) I did a taste test at home and asked my man to try one that had butter and one without and he could not tell the difference. Besides making desserts without butter I always try to use whole grains when possible but that did not work here. I tried and was hopeful but they turned to mush.
So the best I can do is no butter and lots of heart-healthy dark chocolate. Most brownie recipes use a stick or two of butter so if you need a brownie, this one is a better choice than one loaded with saturated fat. My recipe uses extra light olive oil instead of butter but you can use any vegetable oil you choose. And the nuts are optional but nuts are nutritious and full of protein and healthy fats so include them if you can. And toast them first – what a difference! The extra chocolate chips, well… that’s up to you and the darker the better.
One thing about melting chocolate: Chocolate is delicate and burns easily so I melt it in a saucepan but with oil added and over very low heat so it doesn’t burn. It takes about 2-3 minutes to melt but needs to be stirred because chocolate tends to hold its shape when melted and you might not know it’s ready until you stir it. The other options for melting are the microwave (which I have never done) and a double boiler (too much trouble).
This is the second brownie recipe I’ve posted. The other whole wheat brownie is not as fudgy but still nice & chewy and also made without butter, but it’s 100% whole wheat. Both my brownies are easy to make but this simple recipe is good for beginners because it uses just a few ingredients and no mixer is needed. In fact, this batter should only be mixed by hand and not over-mixed. Oh, and don’t over bake the brownies! They should feel a little soft in the center when they’re done so don’t bake any longer than 20 minutes! Okay, that’s all. Click here for the recipe. – Jenny Jones
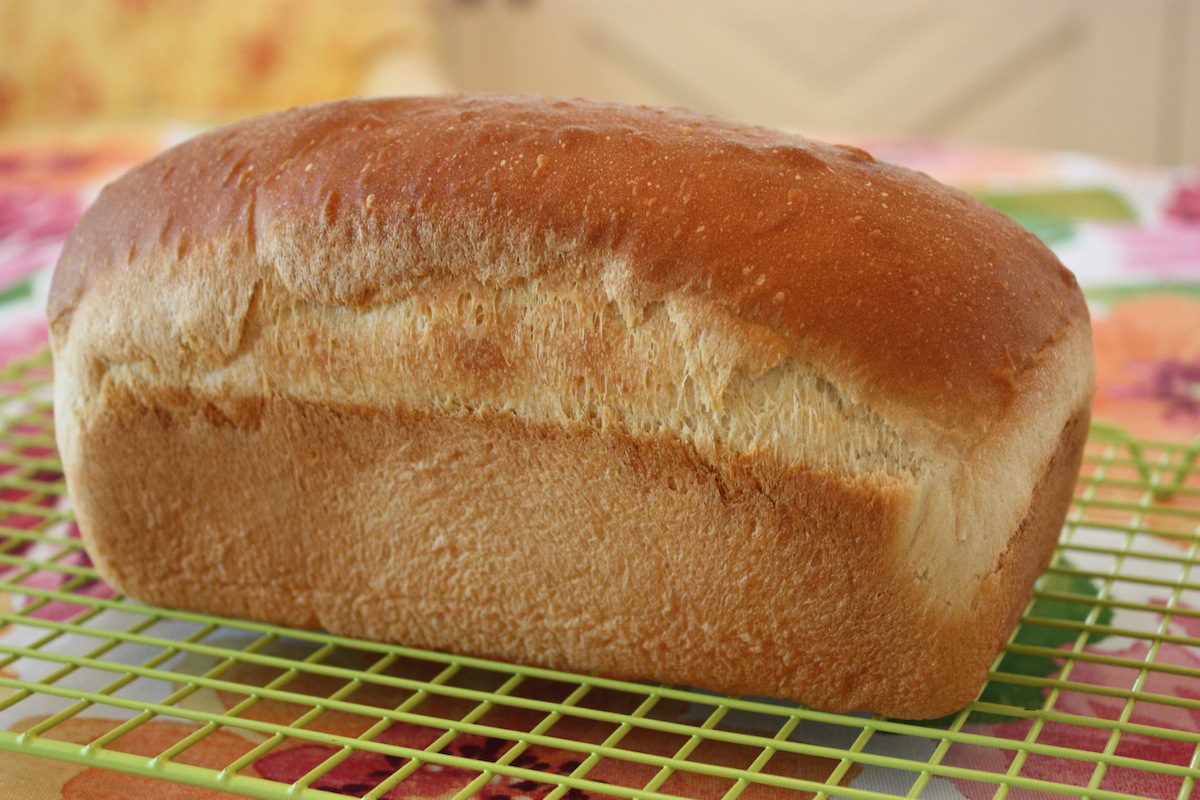
Sometimes, you gotta have some white bread. And if you want it fast, from scratch, I’m here for you. This is another one of my quick and easy one-rise bread recipes, just like my whole wheat bread, but this one makes a soft, old fashioned white sandwich loaf. It’s such and easy and flexible recipe. You can…
~Use all purpose flour or bread flour. ~Use vegetable oil or butter. ~Use instant yeast or dry active yeast. ~Use a mixer or make it by hand.
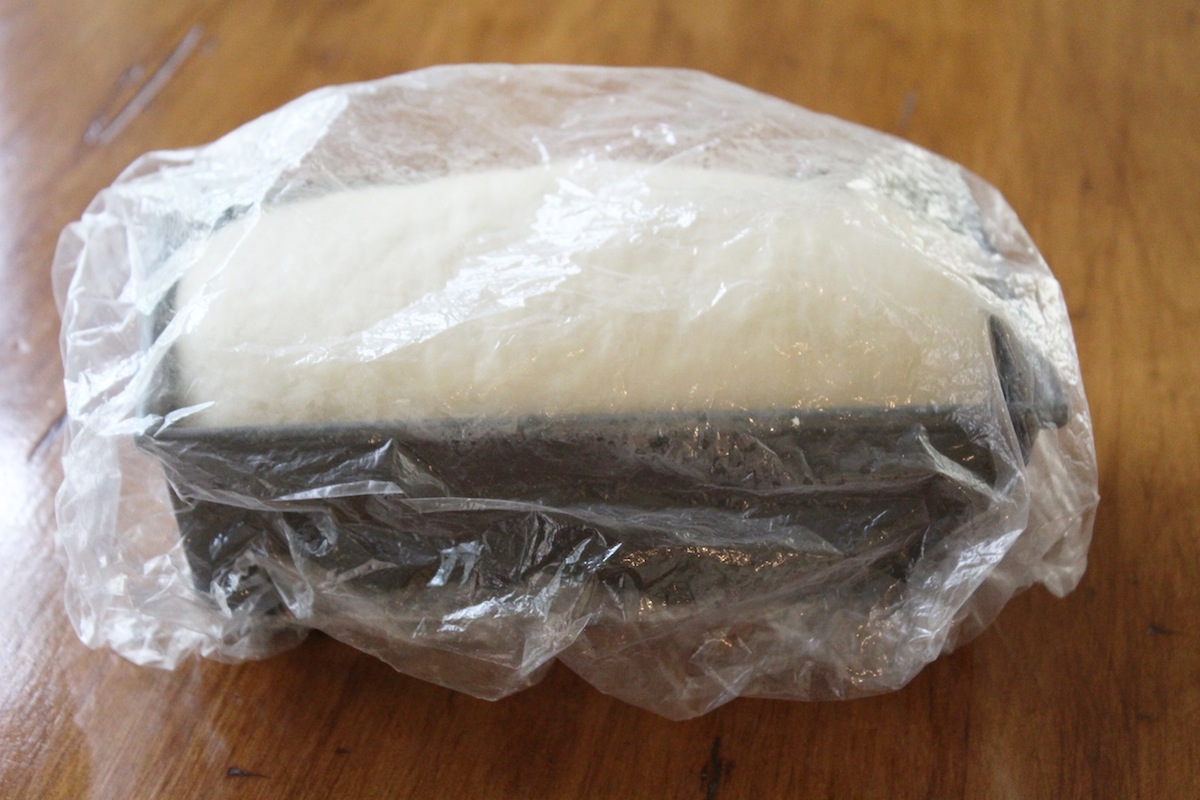
It takes about 90 minutes from start to finish to make this easy bread. And I have a couple of helpful tips. First: Aerate your flour before measuring. If you don’t your dough will be dry. See my flour basics: https://www.jennycancook.com/flour-basics/ Second: The best size loaf pan for yeast bread is 8 1/2 by 4 1/2 inches. If you use a wider or longer pan, the dough won’t rise up and be tall like mine. Third: When rising your bread it will rise faster if there is moisture but if you cover it with plastic wrap, it can stick and be hard to remove without damaging the dough. The solution? A shower cap!
I love this! A clean shower cap is perfect because the elastic will hug the pan and it’s a thicker plastic so you can pull it up to keep it from touching the dough. Before rising, make sure you pull up the plastic high enough to allow the dough to rise an inch above the pan. I don’t eat white bread very often but when I do, this is how I make it. Click here for the recipe. – Jenny Jones
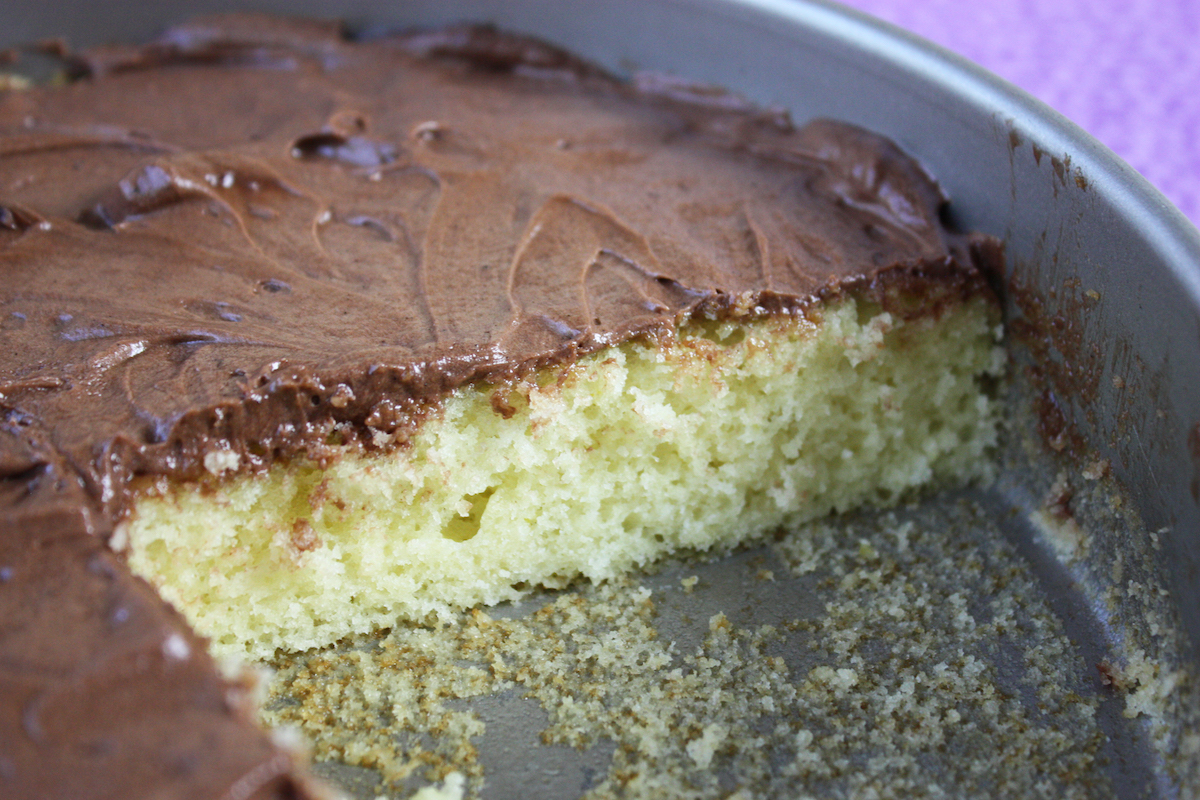
This is my go-to yellow cake, one you can make from scratch in 40 minutes. Try it with my 2-minute chocolate frosting that has only 2 tablespoons of butter. What I like the most is all the things you can do with this quick and easy recipe.
For a fast dessert, I make this cake and frost it right in the pan. It’s a healthier dessert I feel good about and it really satisfies my sweet tooth. I have made it using 1% and 2% low fat milk as well as whole milk. All versions turned out great.
I have also doubled the recipe and made two cakes using two cake pans and used it for my fresh strawberry cake so now you can make my wildly popular strawberry cake with no butter at all!
The one I really love is my Boston cream cake that I make with just one 9-inch cake, which I slice across in half, fill it with homemade custard and top with a chocolate glaze. (why do they call it Boston cream pie? – it’s not pie!)
One thing of note: this is a much better cake when you use a cake strip. See in the picture how the cake is perfectly flat? I highly recommend using a cake strip, also called a baking strip, whether you buy one or make your own. It keeps the edges of the cake from over-baking. Click here to learn about cake strips.
If you want a healthier cake that’s low in sugar and saturated fat, try my recipe. You can use my frosting or do your own thing with this simple, easy recipe. Click herefor the recipe. – Jenny Jones
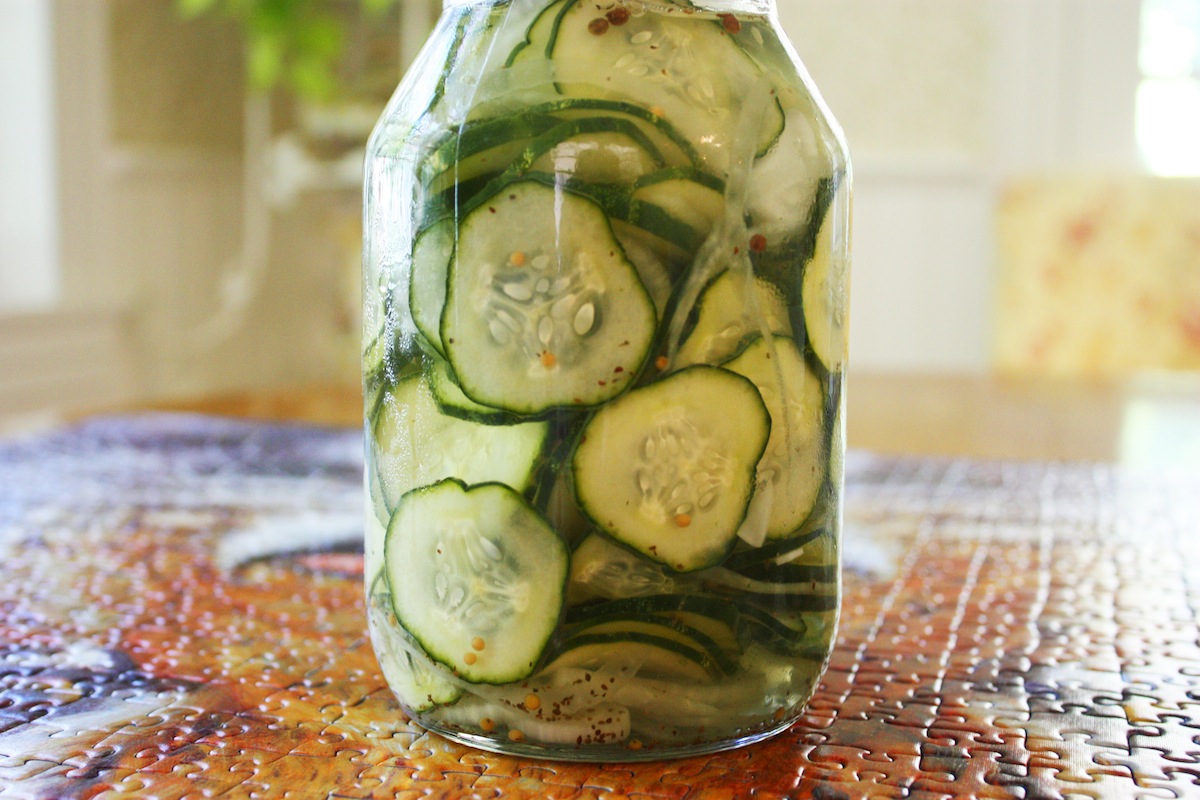
I forgot how easy it is to make homemade pickles. It was a lot easier than putting together that jig saw puzzle they’re sitting on. The pickles took 5 minutes. The puzzle? Three months!
These are bread & butter pickles, which are also called refrigerator pickles, and now is a good time to make them. Cucumbers are at their best during summer and it’s the Kirby cucumber (not the Persian one) that is best for pickles. I sliced the cuces super thin this time and they are so soft they bend but they’re still crispy, probably because I left the skin on. If you peel the cucumbers, the pickles are a lot softer.
I also put more sugar in this time and I found I like the pickles a little sweeter. So I added a note to the recipe that you can use more sugar if you like sweeter pickles. Don’t be freaked out by the amount of sugar: it’s 1/2 to 3/4 of a cup because remember, the sugar mostly stays in the water.
So make some pickles. If you start now, they’ll be ready to eat in 3 hours. Click here for the recipe. – Jenny Jones
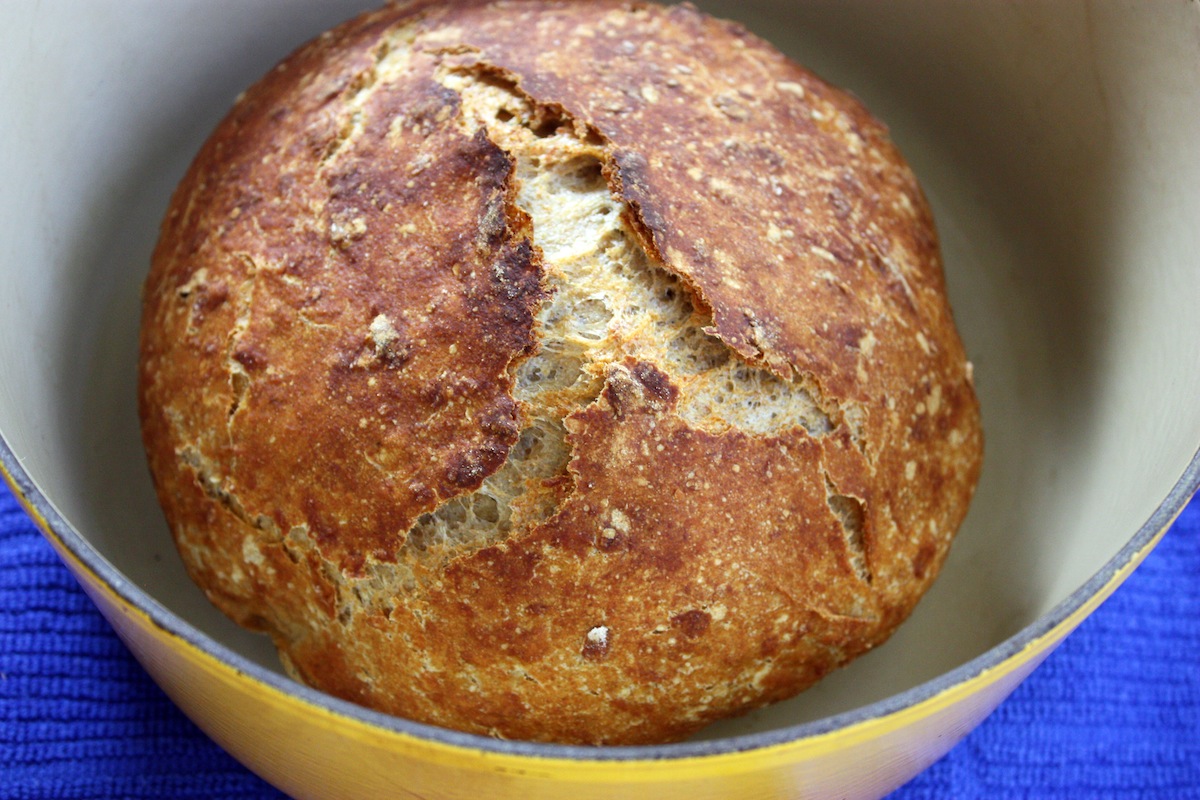
I have stopped buying bread. When it’s this easy to make your own homemade bread with no work and no kneading, and you can eat it fresh and hot from the oven, this is the only way to go. No knead breads are so flexible and forgiving, you can create your own like I did. I’ve made several different versions so far but this is my favorite one.
This loaf is super crusty when it’s first baked and by the second day, it’s not crusty (no breads are the second day) but it’s still a fabulous moist loaf that’s easy to slice and eat. I make it with three equal parts of whole wheat flour (not whole wheat pastry flour), rolled oats, and bread flour or all purpose flour. I would love to make it 100% whole grain but it’s just too dense for me.
This loaf joins my growing list of no knead breads that I’ve made so far:
That’s five more ways to make this easy bread. My first recipe for faster no knead bread works well with the faster, same-day method because it uses bread flour or all-purpose flour. But when you start adding whole grains like this new multigrain bread, it really needs the overnight method. It takes more time but still no work at all.
Here’s how I do it. In the evening around 9-10:00 p.m. I mix the ingredients together (takes 2-3 minutes) and let them sit overnight. The next morning around 8-9:00 a.m. I proceed with the final steps and by noon, I have a fresh, hot, crusty loaf of delicious homemade bread. Click here for the recipe. – Jenny Jones
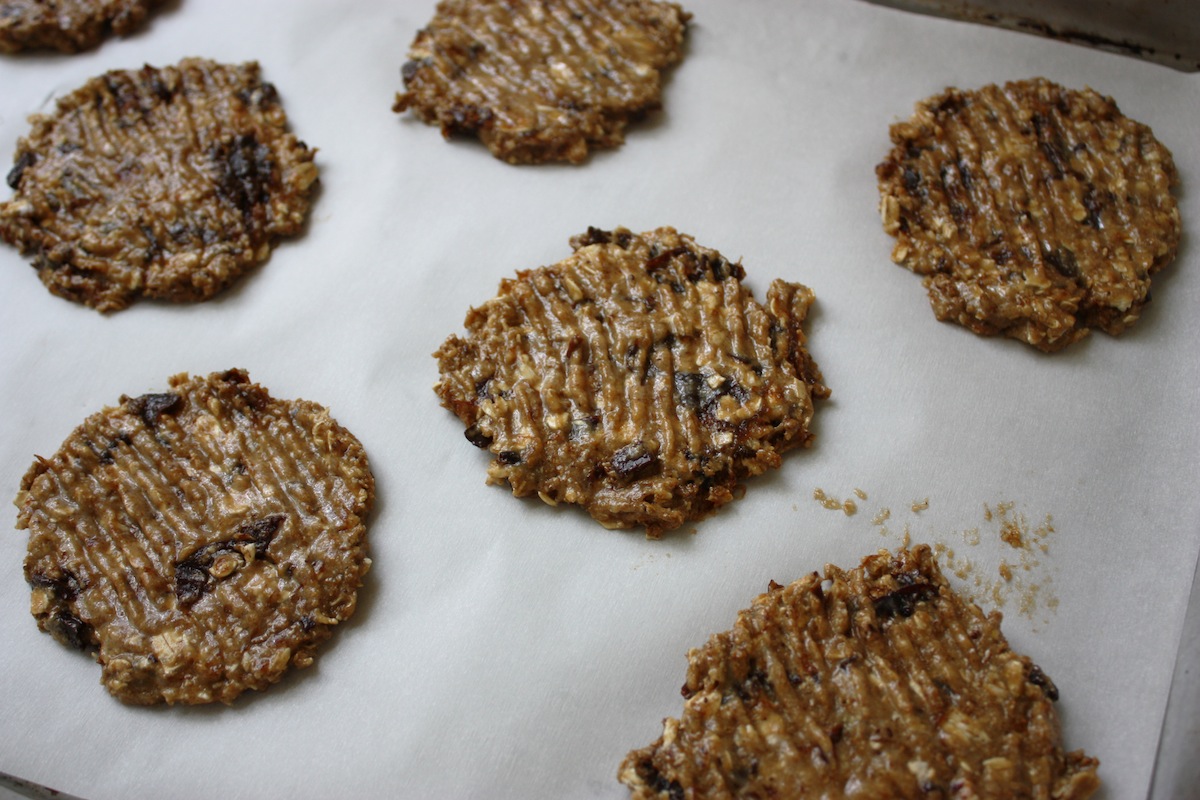
It must be Sunday morning because I’m making breakfast cookies again. Here they are before baking. There are three things that are a constant in my kitchen (besides me)… three things that when I almost run out, I make more. They are: breakfast cookies, granola bars, and tortillas. This morning I ate my last breakfast cookie, there’s one tortilla left and I made granola bars yesterday. So it’s breakfast cookie and tortilla-day today.
Are you wondering why these three? Because you can’t buy anything even close to homemade tortillas. My granola bars are out of this world. And my breakfast cookies may not be pretty, but they are fantastic, especially if you want more fiber in your diet. Those are chopped prunes you see there… or wait… those could be pieces of dark chocolate!
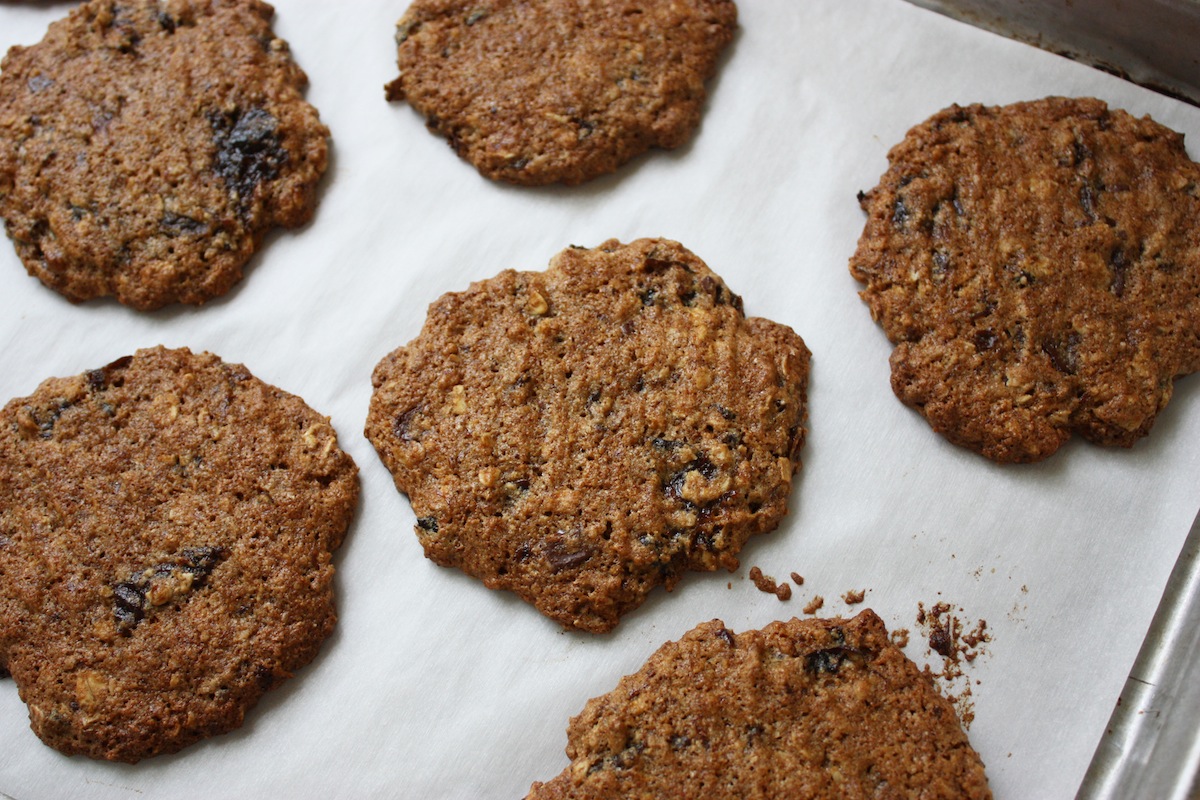
My recipe uses bran cereal, whole wheat pastry flour, and oats (did I mention there are 4 grams of fiber in one cookie?). Then I add some moist chopped prunes (they do not taste like prune cookies!) and either chocolate chips or this time I chopped up some of a dark chocolate bar. And here they are all done…
These are cookies of substance, great taste and texture, and many health benefits. Dark chocolate benefits the heart and all that fiber benefits your digestive system and keeps you regular. As for prunes, besides fiber, they are very high in antioxidants. Prunes benefit your eyes, heart, immune system and can help prevent bone loss.
Just like people, don’t judge this cookie by its appearance. It’s what’s inside that matters. Click here for the recipe. – Jenny Jones
Pssst! Don’t tell anyone these are whole wheat! Just tell them you made delicious apple pancakes for breakfast. Even I was surprised how soft and fluffy these yummy pancakes are. And there’s a ton of apples in there. I use a huge Granny Smith apple that usually weighs over a half pound, which I peel, core, and dice into 1/2- inch pieces. The batter is thick and lumpy and that’s a good thing.
This is my basic buttermilk pancake recipe that I use for blueberry pancakes too. And buttermilk makes the best pancakes! The key to great pancakes is not to over-mix. Never use an electric mixer. Just combine the dry and liquid ingredients together gently by hand until just barely combined. Some bits of visible flour is fine. Then fold in the apples… gently… and you will have a thick and lumpy batter. That’s perfect.
If buttermilk is not available where you live, look at my “Substitutions” blog category. You can make your own but the real thing is better. For cooking my apple pancakes, I use a non-stick electric griddle but you can make pancakes in your largest flat pan. If it’s non-stick you don’t need to grease the pan at all but if you like, you can rub the pan first with a stick of butter.
Everyone’s stoves and griddles are different so the cooking temperature should be somewhere between 360 and 375 degrees F or just below medium-high on the stove. The pancakes should cook in about two minutes per side. For soft and fluffy pancakes, make sure to use whole wheat pastry flour and not whole wheat flour. Click here for the recipe. – Jenny Jones
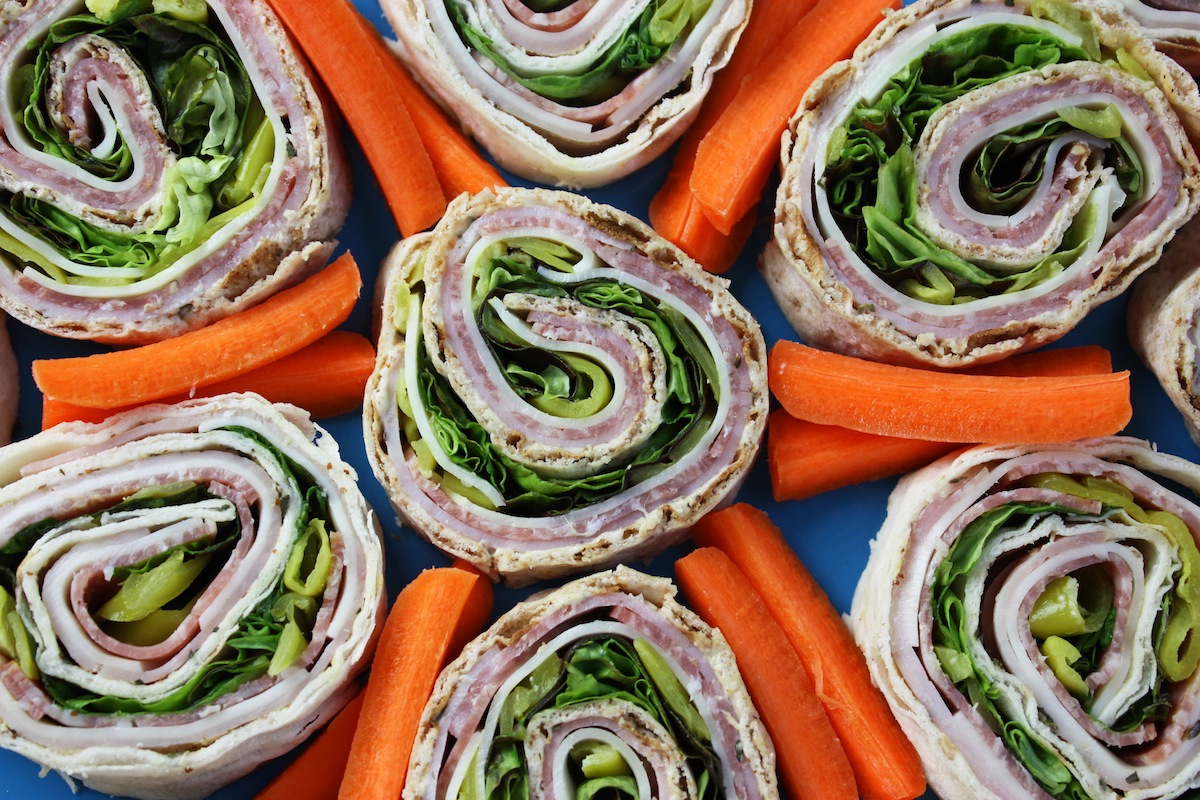
Boy, these are good! They’re easy to make and perfect for a 4th of July party. I’m sharing this idea for the upcoming holiday weekend because I made these Italian sub pinwheels sandwiches for a party once they were a huge hit. But this was a hard recipe to write up because I know everyone will be using different products, depending where they live and what their stores carry. But I did my best.
About the bread: Lavash is perfect for pinwheels because it’s rectangular and easy to roll to get even sandwiches. I used both whole grain lavash and white lavash in this photo but whole grain is my first choice to make these little gems as healthy as possible. I’ve seen lavash in two sizes, 8 by 10 and 9 by 12. If your store doesn’t sell it you can usually find it in a mediterranean or Armenian grocery store. But you can always use large flour tortillas as well.
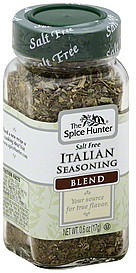
About the filling:My Italian sub pinwheel is made with some traditional sub fillings like ham, salami, and cheese. But you can make this healthier by choosing nitrate-free ham and salami (I use Applegate brand ham) and I use ultra-thin sliced cheese. Mozzarella is my choice but provolone is also good here. Even the meats should be sliced as thinly as possible for easier rolling. My Italian seasoning blend (Spice Hunter brand) is a combination of basil, rosemary, marjoram, thyme, sage, and oregano. If you don’t have a blend, you can use oregano.
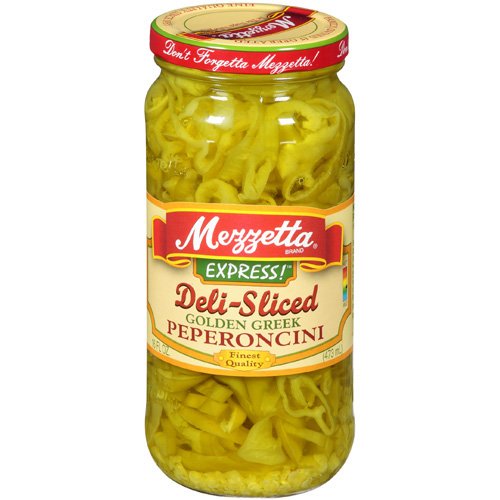
Peperoncini is key to making these taste just like an Italian sub. You can buy them in a jar already sliced.
Oh, and use lots of lettuce. It looks pretty and it’s a healthy green.
About serving: These sandwiches must be made ahead of time, preferably overnight, but at least three hours in advance to give them a chance to hold together and for the bread to moisten. It’s important to roll them up slowly, as tightly as you can, and wrap each roll (you ARE making more than one, right?) in foil and refrigerate. When it’s time to serve, use a sharp serrated knife to cut a little off the ends and then slice the roll into 3/4-inch sandwiches. Place them on your serving plate and keep them covered with plastic as long as you can because they will dry out if left uncovered. But they don’t usually stay around that long. I always serve them with some vegetables – either carrots sticks, cucumbers, or just a plate of crudite.
Other variations: Oh wow, I have made so many different variations. Here are some ideas:
~Turkey and swiss with mayo, mustard, and baby spinach. ~Roast beef with spicy horseradish mustard and lettuce. ~Ham & cheese with cream cheese spread and lettuce. ~Roasted and cooled veggies (peppers, zucchini, onions) with a hummus spread & baby kale. ~Chicken-pesto: Pesto spread (my spinach pesto recipe) with sliced chicken, mozzarella & baby spinach. ~Spicy: Cream cheese mixed with canned “hot” diced green chiles, sliced chicken breast, & lettuce. ~Leftover roast turkey with leftover fresh cranberries (my recipe) as a spread. (I’m making this after Thanksgiving!)
~There are endless variations: add finely sliced onion, olives, pickles, roasted red peppers, shredded carrots, etc., etc., etc.
Click here for the recipe and have a great 4th of July weekend! – Jenny Jones

 Now you just pour the batter right on top of the apples. The batter is really light and super easy, made with milk, eggs, and flour basically and you just whisk it by hand – no mixer. As soon as the batter is added, using an oven glove, you put the hot pan in the oven (preheated to 400 degrees F) and fifteen minutes later, it’s done. Then you carefully, with oven gloves, invert in onto a big serving plate and it will look like this…
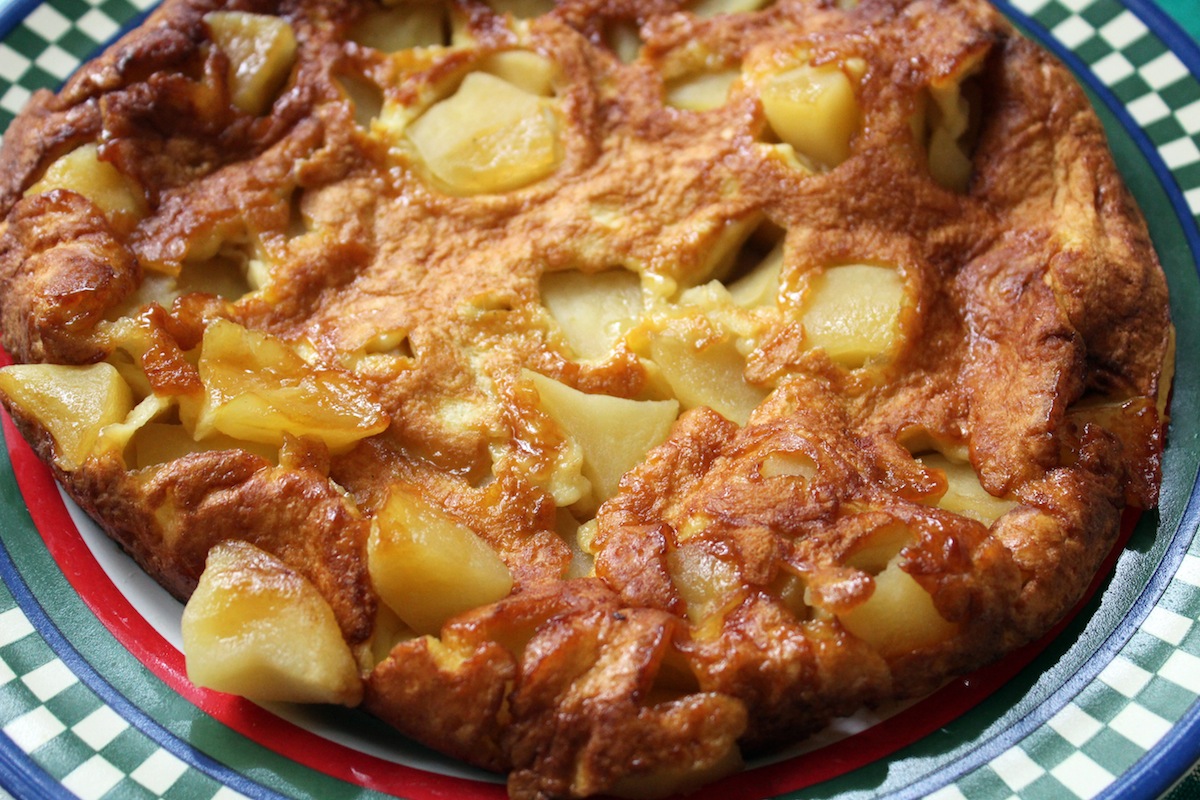 The edges of the pancake are caramelized just like the apples, which are soft and sticky sweet. You don’t need any topping like syrup but you can sprinkle it with a dusting of powdered sugar if you like. If this is all you’re eating, it will serve two but if you have some eggs and toast and this on the side, it will serve four. And if you’re starving and you make this easy apple pancake, someone I know actually ate the whole thing in one sitting. It wasn’t me. That’s my story and I’m sticking to it. Click here for the recipe. – Jenny Jones