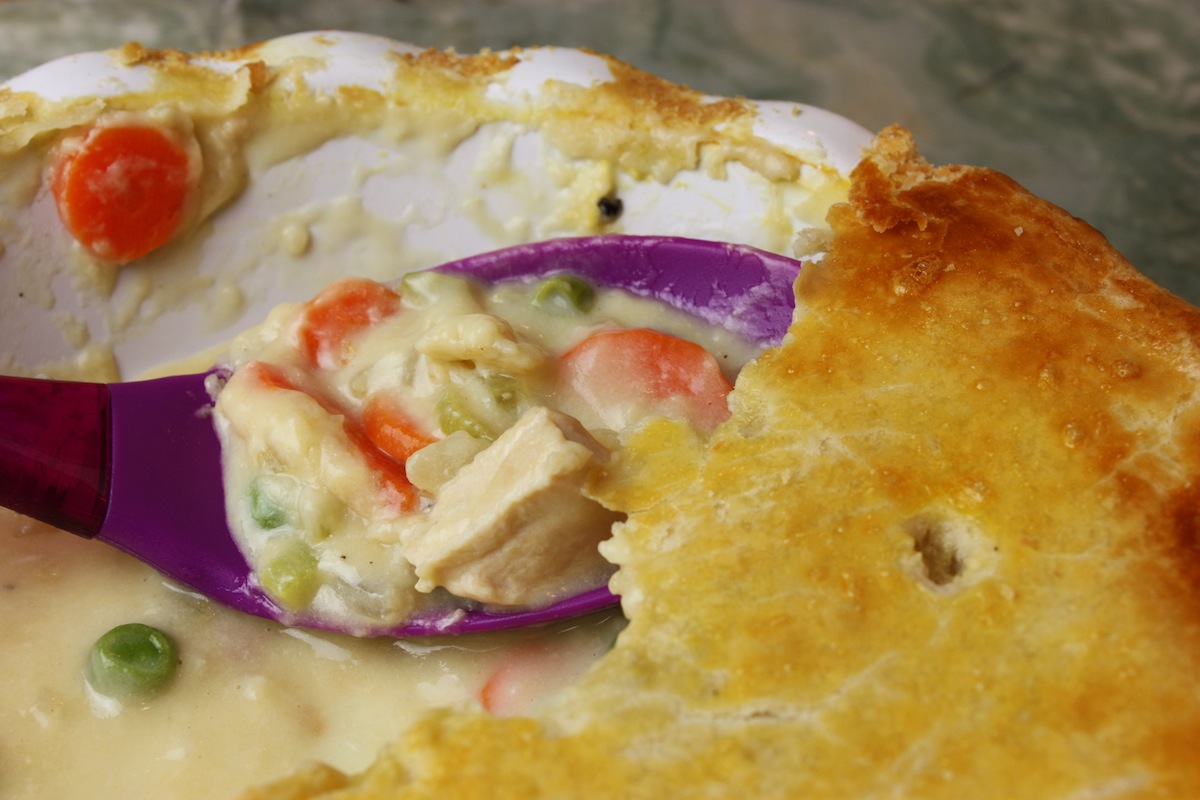
If you haven’t tried my chicken pot pie you’re missing something really good… and really easy. I haven’t had it for a while and when I made it today, I had forgotten how quick and easy it is and how absolutely delicious it is too! I use white meat chicken breast, carrots, celery and peas so it has lean protein, some vegetables, and I top it with my easy oil crust (made with extra-light olive oil) and wow – it was awesome! Here’s the recipe. I also made a salad (I make one just about every day) – this one had baby lettuce, cabbage, green onion, garbanzo beans, and a cherry vinegar dressing. And for dessert, I made chocolate cake.
But this is not just any chocolate cake. It’s the easiest and one of the healthiest cakes ever. It’s an easy one-bowl cake made without eggs or butter so only the frosting has butter and that’s only two tablespoons. But if someone wants to avoid butter completely, you could skip the frosting and just dust it with some powdered sugar. I don’t know why I haven’t posted the recipe. I think it’s because I just frost it in the pan and it’s not very fancy looking. But it’s so good, I will be posting the recipe. I make it all the time here at home.
We were just negotiating over the size of the servings. In order to avoid any hurt feeling, I try not to make my slice any bigger than his. It’s just easier that way. So that’s what I cooked today. …just sharing… – Jenny Jones
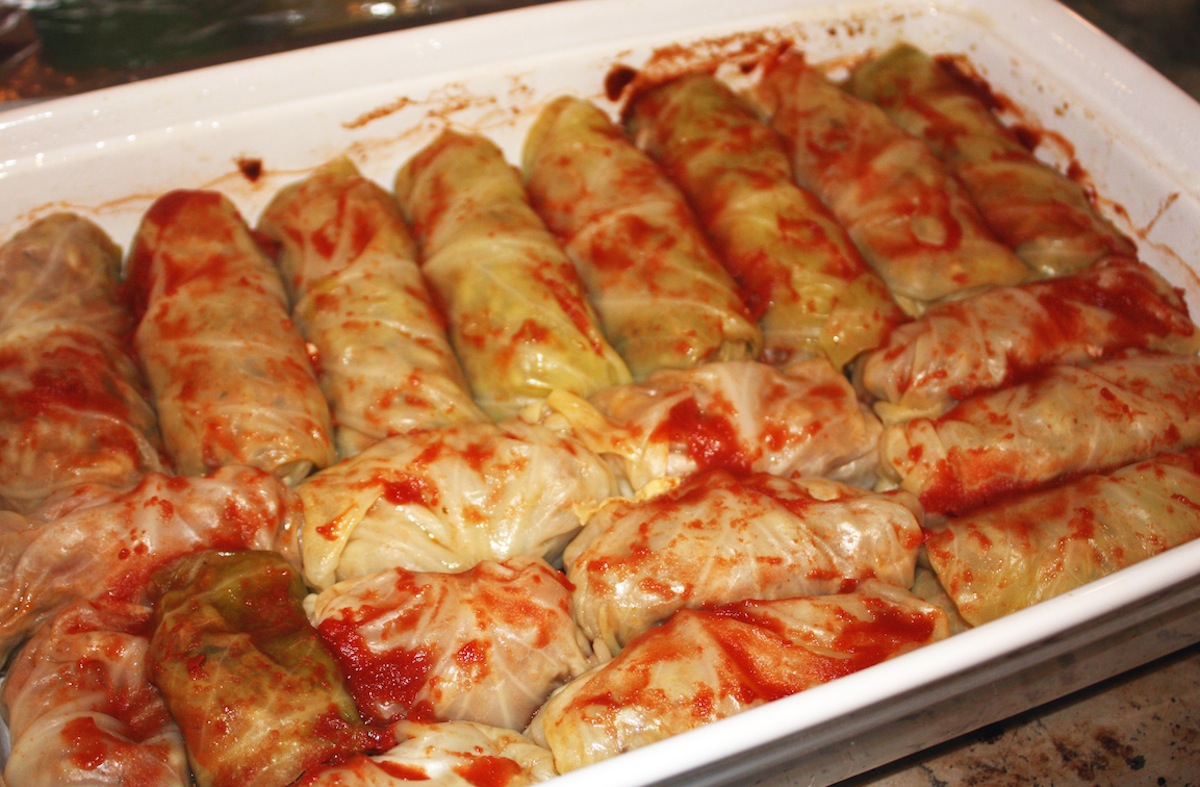
I’ve been craving cabbage rolls for days so I made them yesterday but I’m eating them today. They always taste better the next day so I like to make them the day before. This time the cabbage was a little small so it made twenty little bundles of goodness filled with ground sirloin, rice, tomato, and mushrooms. The mushrooms are optional but I think they add a nice extra flavor. And I like to use different liquids to pour over the rolls for baking. This time I used some tomato but other times I just use water from boiling the cabbage. I’ve even topped them with sauerkraut and its juice for baking and they were great.
When my dad made these we always had them with sour cream so today I browned them in a little olive oil (my dad used butter) and had them with reduced fat sour cream and yummmmm!!!! I remember my mother used to make cabbage rolls (golabki) and she even liked them cold – just stick one on a fork and there’s your snack. Polish cabbage rolls is one of my most viewed videos – I never expected that. Here’s the recipe.
For dessert I made my apple pie bars.
It’s less work than apple pie but just as tasty, made with 2 pounds of Granny Smith apples and my healthier and easier oil crust. It’s the same crust I use for all my pies, including chicken pot pie. Ooooh, chicken pot pie sounds so good – I may have to make it tomorrow. Back to my apple pie bars. There’s an ongoing debate in this house about whether these are apple pie bars or a square apple pie. I don’t care what we call it as long as we get to eat it. Here’s the recipe and that’s what I cooked today. …just sharing… – Jenny Jones
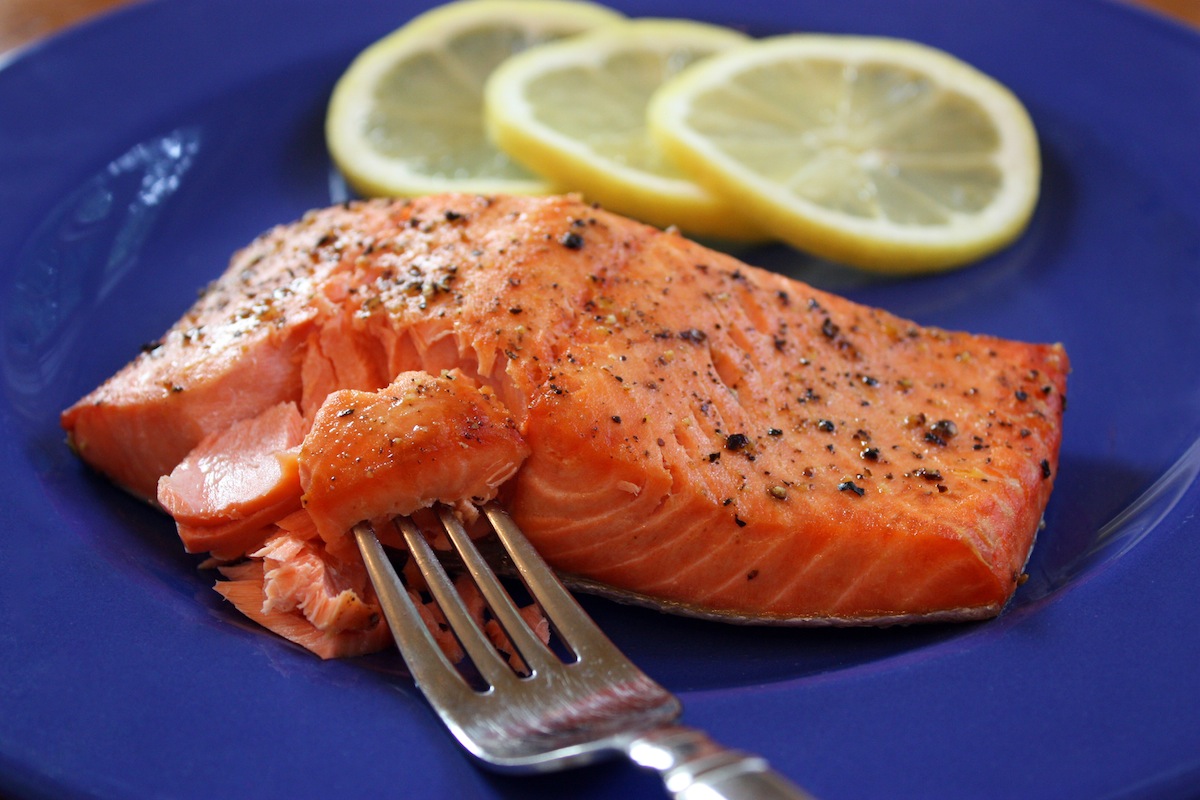
It’s so simple and so healthy. Simple because my easy broiled salmon only takes 15 minutes to make – all you need is a lemon and some olive oil. And healthy because salmon is good for your heart…. and your eyes, and your brain, and your joints, and etc., etc.. Salmon is always on the list of foods with the most health benefits and it’s easier to cook than you think.
Wild caught salmon is the best choice and of course getting it fresh is important when it comes to fish. It’s always good to know what day they deliver fish at the market and that’s the day to go get it. There are lots of ways to cook salmon (most of them too fancy for me) so I keep it simple – just lemon, oil, salt and pepper. Of course you can add other spices if you like but this simple recipe is really good.
Every oven is different and every broiler is too so your fish may take less time to cook, or more depending on a few things. 1) How strong is your broiler? 2) What is the distance between your oven rack and the broiler? 3) How thick is your salmon? 4) How do you like it cooked?
In my kitchen, the broiler has two setting, high and medium. I cook it on the high setting. I place the rack one below the top, which puts my oven rack around 5 1/2 to 6 inches below the heat. The salmon I find at my store is usually about an inch thick but depending on the thickness of the fish, you would cook it about 10 minutes per inch. I prefer my fish cooked all the way through but if you want it less done inside, cook it for a little less time.
A recipe for broiling is different from baking. Baking is more exact but broiling depends on all kinds of variables so just use your common sense and keep an eye on it. As for what to serve with this beautiful fish, I always make something on the stove top since the oven is occupied, so I often make rice and a steamed vegetable or my rice with kale. I also like salmon with my spaghetti with chard. Oh, and sometimes, just some peeled, chopped, and seamed sweet potato goes great with this simple broiled salmon. Click here for the recipe. – Jenny Jones
Questions about your no knead bread or rolls? These notes should help…
My dough didn’t rise.
No knead dough doesn’t rise like standard yeast breads, it only puffs up and gets bubbly. It will be a little bigger after the resting time but don’t look for a much larger volume.
Your yeast may not be fresh and should not be used past the expiration date. Even with a good expiration date, yeast has a short shelf life once a package is opened. Even with the small packets, once it’s opened, yeast should be tightly sealed and kept in the freezer, not refrigerated.
Your water may have been the wrong temperature. For the faster method, a temperature between 120°F to 130°F. is best. Anything hotter than that is too hot. And boiling water is definitely out. For the overnight method, cold to room temperature water works.
You changed the recipe. It’s best to follow the recipe exactly for the first time. That way you know it works. Don’t change the recipe the first time, paying attention to every detail. You can get creative later on.
My dough was too dry.
You did not aerate your flour before measuring. Flour always settles in the bag or container and must be aerated before measuring; otherwise, you will be using too much flour. To aerate flour, using a large spoon or spatula, stir the flour around to incorporate some air. To see a short video on how to aerate flour, click here.
You measured the flour incorrectly. To measure flour, use a flat-topped measuring cup, gently spoon the aerated flour into the cup until it’s mounded above the rim and level off the excess with the back of a knife. Do not tap the cup or the container of flour.
You changed the recipe or used whole wheat flour.
My dough was too runny.
You used too much liquid or not enough flour. Use a cup specific for measuring liquids, have it on a flat surface and view it at eye level to make sure your liquid is at the correct line.
You sifted the flour before measuring, which would cause you to use less flour than required. Never sift flour before measuring unless specified in the recipe. You should only aerate your flour before measuring. (see my Flour Basics on how to aerate flour)
You changed the recipe.
My bread wasn’t cooked inside.
Your oven (and pot) were not preheated long enough. Use an oven thermometer to make sure your oven has reached 450°F. It can take over half an hour.
You sliced it too soon. After bread is removed from the oven, it will continue to cook inside. It’s best to let it cool completely before slicing (I know it’s hard to wait!)
My bottom crust was too hard.
Your pot was too close to the heat. Try raising the oven rack so the bottom is not as close to the heat.
Your oven may be hotter than you think. Use an oven thermometer to assure your oven is the proper temperature.
Try placing a baking pan on the rack below the bread to block some of the heat.
Try a slightly lower temperature by preheating to 450°F but lowering the temperature to 425°F to bake.
If using a black cast iron pot, try another one that is not black.
Do not bake any longer than indicated.
Put extra layers of parchment paper on the bottom. Reynolds “Cookie Baking Sheets” come folded so there are four layers. Place one on the bottom just before putting the dough in to bake.
I don’t have a Dutch oven.
I have only made this bread in an enameled cast iron Dutch oven (Le Creuset) but other people have commented that they had success using:
a glass pyrex dish with a lid
a stainless steel pot with a lid
a stainless steel pot with foil on top and the original pot lid over the the foil
a clay baker
a springform pan with an aluminum foil top
a pizza stone with a stainless steel bowl as a cover
several people posted here that they used a black cast iron pot with a lid
a roasting pan with a tightly sealed foil heavy duty top
a heavy soup pot with a lid
a corning dish with a glass lid
a Romertopf clay pot
a crock pot bowl with a lid
two nonstick bread pans, no parchment paper – put the dough in one of the bread pans, flip the other pan upside down over the first pan and put binder clips on the two ends to hold the pans together.
an oven-safe stoneware insert (removed from a slow cooker) with a cookie sheet over it as a lid.
a cast iron skillet and foil as a lid
2 1/2 quart corning ware casserole.
Keep in mind that any lid must be tight fitting because you need to create steam inside the pot and the lid should have an oven-proof handle (not plastic). Your pot will need to hold at least 3 quarts but 5 to 6 quarts is most common. Or… You can make my No Knead Ciabatta Bread or No Dutch Oven Bread – they both bake on a pan, no Dutch oven needed. Click here for the recipes.
My parchment paper stuck.
If your parchment paper stuck it’s from using an inferior brand. Reynolds brand will never stick. If you can not get Reynolds brand you need something to lift the dough and place it in the Dutch oven. You can try using a well floured kitchen towel to transfer the dough, letting the dough roll off the towel into the hot pot. Do not leave the towel in the pot, only use it as a means of lifting the dough. Do NOT use wax paper in a hot oven. It will melt onto the bread and it will be ruined. I don’t use a towel because my dough always sticks to the towel. Parchment paper makes the job super easy but inferior papers can stick. I always use Reynolds brand – it never sticks.
I don’t have parchment paper.
You can make no knead bread without parchment paper. Parchment is the easiest way to lift the dough and place it into the hot pot.
Another way is to place the dough directly into the (ungreased) hot pot. You have to be careful because the pot is very hot.
Some recipes use a floured towel to rest the dough and you would use the towel to transfer the dough into the pot, letting it roll off the towel in to the hot pot. For me, the dough usually stuck to the towel, even though it’s floured, so I switched to parchment paper.
Can I add extras to the dough and when should I add them?
You can add extras to your dough at the very beginning when you first mix it up.
I have added nuts, raisins, sugar, caraway seeds, 10-grain cereal, oats, and olives. You can see all my variations in the No Knead Breads category.
Other commenters say they have added: cheese, rosemary, Italian herbs, crushed garlic, garlic powder, blueberries, cranberries, honey, cinnamon, molasses, jalapeno peppers, olive oil, sun dried tomatoes, maple sugar, and “Everything But The Bagel.”
Can I double the recipe?
A helpful woman named Marion says yes. “I doubled everything, flour, yeast, salt and water. Used 5 quart Dutch oven. It was a little tricky getting the folded dough into the paper basket but otherwise smooth sailing! I’ve seen this question up here many times and no one has answered it, so that made me think it might be a no-go but actually it’s great.” (Thank you, Marion)
I live at a high altitude. Any changes needed?
Several people have commented that they live at high altitudes (from 4,500 to 8,400 feet) and made no changes to the recipe, and their bread turned out very well.
How do I aerate flour?
Flour must be aerated before measuring because it often settles in the bag or container making it heavy and compact, resulting in too much flour being measured. Aerating basically means fluffing it up and is not the same as sifting. Flour should not be sifted before measuring unless the recipe states to do so. Sifting will result in too little flour being measured.If you dip into flour without aerating, you will be getting too much flour and your dough will be too dry. To aerate flour you simply stir it around with a spoon before measuring. To see a short video on how to aerate flour, click here.
After aerating, be sure to use a flat-topped dry measuring cup. There are two ways to measure the flour: 1) Scoop & Level – Gently scoop the flour up with a spoon and sprinkle it into your measuring cup until it’s mounded above the rim. Do not tap the cup or the container of flour. Finally, level off the excess flour with the back of a knife. 2) Dip & Level – Gently dip your measuring cup into the flour until it’s mounded above the rim and level off the excess flour with the back of a knife. Sources vary but in my kitchen, a cup of flour weighs between 4 1/2 and 5 ounces.
Can I make it with Gluten-Free flour?
Well…. you can make it with gluten free flour but you may not like it. I tried it and the loaf was smaller and more dense and chewy, without the traditional big holes and it didn’t taste anything like the original recipe. I tried it once but nobody wanted to eat it.
Can I make it with Sourdough Starter?
I’m sorry I have no experience with sourdough starter but there are many comments from those who have used it.
Don’t you need sugar to feed the yeast?
No. You do not need sugar to activate the yeast. This is a half-true old wives tale left over from when yeast wasn’t preserved as well as it is today.
Doesn’t hot water kill the yeast?
No. Hot water does not kill yeast but boiling water will. Today’s yeast is more sturdy and accommodating than years ago and can tolerate water or liquid up to 130°F. The killing point for yeast is 140°F.
What size Dutch oven do I need?
The ideal size of Dutch oven for no knead bread is 5 or 5 1/2 quart. I make mine in a 5 1/2 quart enameled Dutch oven but I have also made it in a Dutch oven that measures 3 1/2 quarts.
A Final Note: If you have followed my recipe exactly with no changes at all and it doesn’t look right before baking, don’t make adjustments to try to “fix” it. Trust the recipe, don’t change anything and continue as directed. You may be surprised that it turns out after all.
WITH BAKING, IT’S IMPORTANT TO FOLLOW THE RECIPE EXACTLY, RIGHT DOWN TO THE SIZE OF THE PAN. EVEN THE SMALLEST CHANGE CAN CAUSE A RECIPE TO FAIL.
Dough Didn’t Rise
Your liquid may have been the wrong temperature. Using an instant read thermometer is the best way to know it’s correct.
Your yeast may not be fresh and should not be used past the expiration date. Even with a good expiration date yeast has a short shelf life once a package is opened. Even with the small packets, once it’s opened, yeast should be tightly sealed and kept in the freezer, not refrigerated.
You used the wrong size pan. Using a larger pan than is noted lets the dough spread sideways instead of rising upwards.
You changed the recipe. It’s important to follow the recipe exactly, paying attention to every detail.
Dough Too Dry
You did not aerate your flour before measuring. Flour always settles in the bag or container and must be aerated before measuring; otherwise, you will be using too much flour. To aerate flour, using a large spoon or spatula, stir the flour around to incorporate some air. To see a short video on how to aerate flour, click here.
You measured the flour incorrectly. To measure flour, use a flat-topped measuring cup, gently spoon the aerated flour into the cup until it’s mounded above the rim and level off the excess with the back of a knife. Do not tap the cup or the container of flour.
You used a different flour than stated in the recipe.
Dough Too Sticky
You used too much liquid or not enough flour. Use a cup specific for measuring liquids, have it on a flat surface and view it at eye level to make sure your liquid is at the correct line.
You sifted the flour before measuring, which would cause you to use less flour than required.
You used a different flour than stated in the recipe.
Don’t you need sugar to feed the yeast?
No. You do not need sugar to activate the yeast. This is a half-true old wives tale left over from when yeast wasn’t preserved as well as it is today.
Doesn’t hot water kill the yeast?
No. Hot water does not kill yeast. Today’s yeast is more sturdy and accommodating than years ago and can tolerate water or liquid up to 130 degrees F. The killing point for yeast is 140 degrees F.
“Which flour do I use for bread, or muffins, or cookies?” “Can I substitute one flour for another?” “Why is my flour mixture so dry?” I hope this helps clarify any questions you have about flour. By the way, with all baking the amount of protein in flour matters. The lower the protein, the softer the baked goods. So here is my simple guideline to baking with flour:
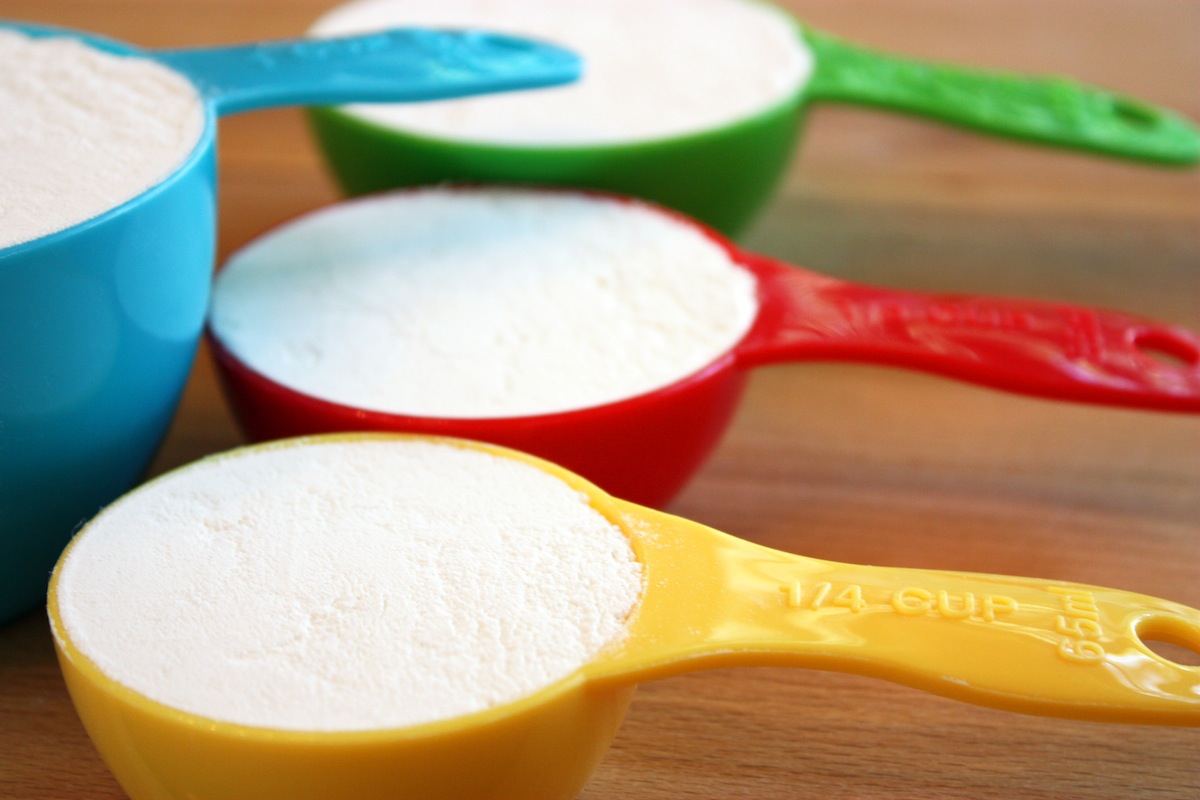
How to Measure (& Aerate) Flour Flour must be aerated before measuring because it often settles in the bag or container making it heavy and compact, resulting in too much flour being measured. Aerating basically means fluffing it up and is not the same as sifting. Flour should not be sifted before measuring unless the recipe states to do so. Sifting will result in too little flour being measured.
If you dip into flour without aerating, you will be getting too much flour and your dough will be too dry. To aerate flour you simply stir it around with a spoon before measuring. To measure, be sure to use a flat-topped dry measuring cup like in my photo. To see a short video on how to aerate flour click here.
After aerating, there are two ways to measure the flour: 1) Scoop & Level – Gently scoop the flour up with a spoon and sprinkle it into your measuring cup until it’s mounded above the rim. Do not tap the cup or the container of flour. Finally, level off the excess flour with the back of a knife. 2) Dip & Level – Gently dip your measuring cup into the flour until it’s mounded above the rim and level off the excess flour with the back of a knife. In my kitchen, a cup a flour weighs 4 1/2 ounces (130 grams).
The Difference Between Flours
Whole wheat flour(about 14% protein/gluten) Whole wheat flour is not the same as whole wheat pastry flour and should not be substituted for whole wheat pastry flour. Whole wheat flour is milled from hard winter wheat and is best used only for yeast breads. A loaf made entirely with whole wheat flour will be a dense and somewhat heavy loaf. For a softer loaf, it is often combined with some all-purpose or bread flour. Whole wheat flour is not suitable for other baking like cookies and cakes. *Since it contains the germ of the wheat which contains oil, once opened, this flour should be kept refrigerated in a tightly sealed container.
Whole wheat pastry flour(about 10% protein/gluten) Also called whole grain pastry flour, this flour is good for most recipes that use all-purpose flour when you want to add fiber. Whole wheat pastry flour is milled from a soft summer wheat and is best for baking cookies, brownies, pancakes, waffles, quick breads, and some cakes. Results will not be as light and soft as using all-purpose flour but you can also mix part whole wheat pastry flour and part all-purpose flour for soft baked goods with added fiber. (I use this flour the most in cookies, brownies, even pancakes & waffles for extra fiber) This flour is not a good substitute for whole wheat flour and is not suitable for baking yeast breads. Don’t have whole wheat pastry flour? Regular whole wheat flour is not a good substitute – your baked goods will be dense and heavy. Look for whole wheat pastry flour at health food stores or you can order it online. Once opened, it should be kept refrigerated in a tightly-sealed container.
Bread flour(about 14% protein/gluten) This flour is designed for yeast baking. It helps create more gluten for a better rise in yeast doughs. Use it for yeast bread and pizza dough for a chewy texture and good structure. However, all-purpose flour works almost as well with yeast. From my experience, if you don’t have bread flour, all-purpose flour can be used as a substitute in yeast bread and pizza dough.
All-purpose flour (about 10% protein/gluten) The name says it all. Use it for cookies, cakes, quick breads, yeast breads, pies, pancakes, etc.
Pastry flour(about 9% protein/gluten) This flour falls between all-purpose flour and cake flour and can be used in pastries, cookies and cakes. This flour is not suitable for baking yeast breads.
Cake flour(about 8% protein/gluten) This very fine grain flour is good in light and airy cakes like angel food cake. However, if a recipe does not call for cake flour and you decide to use it, you would use more (2 tablespoons more per each cup). Conversely, if a recipe calls for cake flour and you don’t have it, you can make your own: For one cup of cake flour, measure one cup of all-purpose flour, remove 2 tablespoons of flour and replace that with 2 tablespoons of cornstarch. I do not use cake flour – I don’t find it necessary. This flour is not suitable for baking yeast breads.
Self-rising flour(about 8 % protein/gluten) This soft flour is similar to pastry flour but has salt and baking powder added. Many southern recipes call for this flour in biscuits and pancakes but if the recipe calls for all-purpose flour and you substitute self-rising flour, you will need to adjust any added salt and baking powder. (one cup of self-rising flour contains 1 ½ teaspoons of baking powder and ¼ to ½ teaspoon of salt) This flour is not suitable for yeast breads.
I hope these simple flour basics are helpful. – Jenny Jones
If your parchment paper stuck it’s from using an inferior brand. Reynolds brand always works for me. I got a cheaper parchment paper once and everything stuck to it. I only use Reynolds brand – it never sticks. (This is not a paid endorsement, I’m just sharing what works for me). NOTE: Wax paper is NOT the same as parchment paper. DO NOT USE WAX PAPER in the oven because it will melt onto your food.
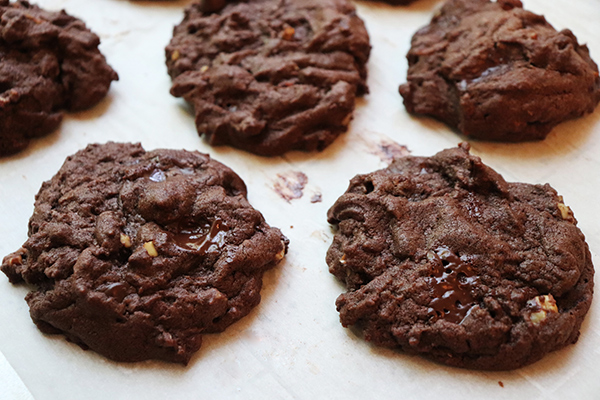
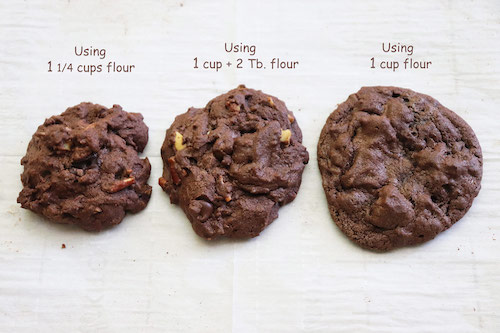
There are three ways to make these cookies depending on the amount of flour you use. You can make them more chunky and firm or softer and spreadable. My original recipe calls for 1 1/4 cups of all purpose flour. But you can use less flour for a softer cookie. See my examples below:
You can never go wrong with a chocolate dessert. I always use Dutch processed cocoa for two reasons. One, it’s less bitter than regular cocoa and two, it produces a rich dark color as you can see. It’s not always easy to find but right now my store carries Droste brand cocoa so that’s what I use. Always looking for ways to reduce saturated fat, I reduced it even more today. Instead of 1/4 cup of butter I used 3 tablespoons and then I increased the oil from 1/4 cup to 1/3 of a cup. No matter how good something sweet looks, if the butter is measured in sticks, I always pass. I know from experience that you can make delicious, healthier desserts with very little and many times, no butter at all. For dinner I made a salad and my vegetable-bean pasta and cookies for dessert. Did I say cookies? I meant “a cookie” for dessert. That’s right. One cookie. That’s my story and I’m sticking to it. 😉
I usually add toasted walnuts and pecans to my cookies. The reason for the mixed nuts is I can never decide, plus using both nuts seems to add even more flavors but I always toast the nuts first. In fact, I toast a whole bag of nuts and then keep them refrigerated for all my baking. To learn how to toast nuts, see the “How To” section of my blog. You’ll be glad you toasted the nuts for these delicious cookies. Click here for the recipe. – Jenny Jones

 If you haven’t tried my chicken pot pie you’re missing something really good… and really easy. I haven’t had it for a while and when I made it today, I had forgotten how quick and easy it is and how absolutely delicious it is too! I use white meat chicken breast, carrots, celery and peas so it has lean protein, some vegetables, and I top it with my easy oil crust (made with extra-light olive oil) and wow – it was awesome! Here’s the recipe. I also made a salad (I make one just about every day) – this one had baby lettuce, cabbage, green onion, garbanzo beans, and a cherry vinegar dressing. And for dessert, I made chocolate cake.
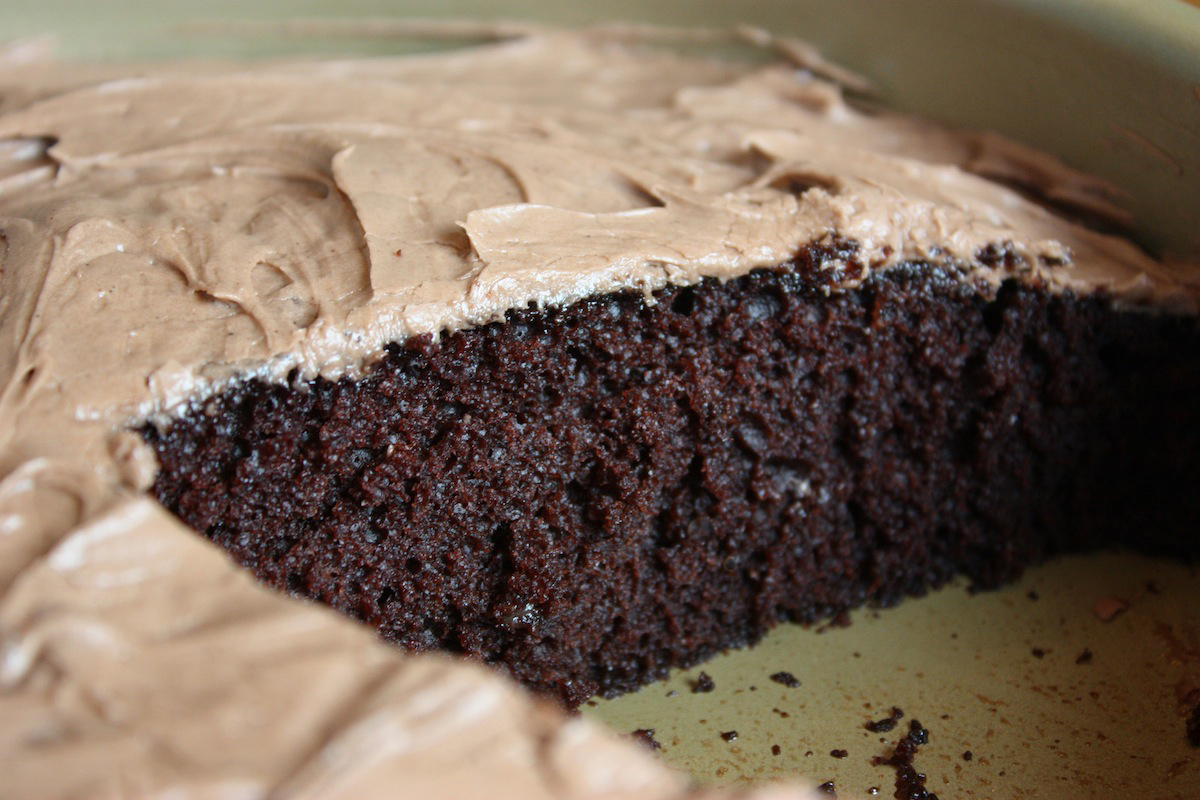 But this is not just any chocolate cake. It’s the easiest and one of the healthiest cakes ever. It’s an easy one-bowl cake made without eggs or butter so only the frosting has butter and that’s only two tablespoons. But if someone wants to avoid butter completely, you could skip the frosting and just dust it with some powdered sugar. I don’t know why I haven’t posted the recipe. I think it’s because I just frost it in the pan and it’s not very fancy looking. But it’s so good, I will be posting the recipe. I make it all the time here at home.