My dough didn’t rise.
- No knead dough doesn’t rise like standard yeast breads, it only puffs up and gets bubbly. It will be a little bigger after the resting time but don’t look for a much larger volume.
- Your yeast may not be fresh and should not be used past the expiration date. Even with a good expiration date, yeast has a short shelf life once a package is opened. Even with the small packets, once it’s opened, yeast should be tightly sealed and kept in the freezer, not refrigerated.
- Your water may have been the wrong temperature. For the faster method, hot tap water is usually around 125 to 130°F. Anything hotter than that is too hot. And boiling water is definitely out. For the overnight method, cold to room temperature water works.
- You changed the recipe. It’s best to follow the recipe exactly for the first time. That way you know it works. Don’t change the recipe the first time, paying attention to every detail. You can get creative later on.
My dough was too dry.
- You did not aerate your flour before measuring. Flour always settles in the bag or container and must be aerated before measuring; otherwise, you will be using too much flour. To aerate flour, using a large spoon or spatula, stir the flour around to incorporate some air.
- You measured the flour incorrectly. To measure flour, use a flat-topped measuring cup, gently spoon the aerated flour into the cup until it’s mounded above the rim and level off the excess with the back of a knife. Do not tap the cup or the container of flour.
- You changed the recipe.
My dough was too runny.
- You used too much liquid or not enough flour. Use a cup specific for measuring liquids, have it on a flat surface and view it at eye level to make sure your liquid is at the correct line.
- You sifted the flour before measuring, which would cause you to use less flour than required.
- You changed the recipe.
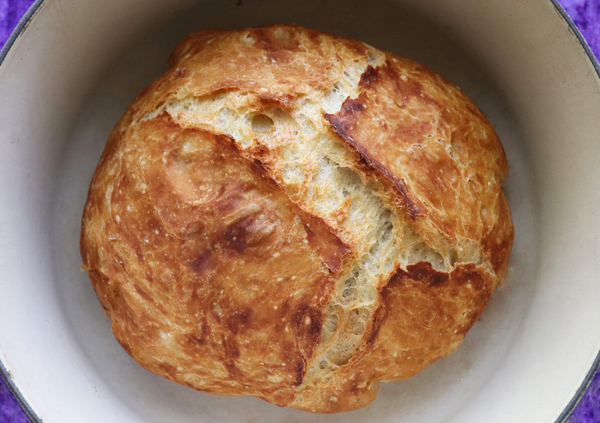
My bread wasn’t cooked inside.
- Your oven (and pot) were not preheated long enough. Use an oven thermometer to make sure your oven has reached 450°F. It can take over half an hour.
- You sliced it too soon. After bread is removed from the oven, it will continue to cook inside. It’s best to let it cool completely before slicing (I know it’s hard to wait!)
Can I make it with Gluten-Free flour?
- Well…. you can make it with gluten free flour but you may not like it. I tried it and the loaf was smaller and more dense and chewy, without the traditional big holes and it didn’t taste anything like the original recipe. I tried it once but nobody wanted to eat it.
I don’t have a Dutch oven.
I have only made this bread in an enameled cast iron Dutch oven (Le Creuset) so I can not recommend something I have not tried. By doing a little research and reading through the comments here, people say they have used:
- a glass pyrex dish with a lid
- a stainless steel pot with a lid
- a clay baker
- a springform pan with an aluminum foil top
- a pizza stone with a stainless steel bowl cover
- a black cast iron pot with a lid
Keep in mind that any lid must be tight fitting because you need to create steam inside the pot and the lid should have an oven-proof handle (not plastic). Your pot will need to hold at least 3 quarts but 5 to 6 quarts is most common.
Doesn’t hot water kill the yeast?
No. Hot water does not kill yeast. Today’s yeast is more sturdy and accommodating than years ago and can tolerate water or liquid up to 130°F. The killing point for yeast is 140°F. (average tap water comes out at about 120-125°F – my tap water is 127°F)
Parchment paper: Parchment stuck? Don't have parchment paper?
If your parchment paper stuck it’s from using an inferior brand. Reynolds brand will never stick. If you can not get Reynolds brand you need something to lift the dough and place it in the Dutch oven. You can try using a well floured kitchen towel to transfer the dough, letting the dough roll off the towel into the hot pot. Do not leave the towel in the pot, only use it as a means of lifting the dough. Do NOT use wax paper in a hot oven. It will melt onto the bread and it will be ruined. I don’t use a towel because my dough always sticks to the towel. Parchment paper makes the job super easy but inferior papers can stick. I always use Reynolds brand – it never sticks.
How Do You Aerate Flour?
Flour must be aerated before measuring because it often settles in the bag or container making it heavy and compact, resulting in too much flour being measured. Aerating basically means fluffing it up and is not the same as sifting. Flour should not be sifted before measuring unless the recipe states to do so. Otherwise sifting will result in too little flour being measured.
If you dip into flour without aerating, you will be getting too much flour and your dough will be too dry. To aerate flour you simply stir it around with a spoon before measuring. To measure, be sure to use a flat-topped dry measuring cup. You can see how I aerate flour in my Easy One Bowl Chocolate Cake video: https://www.jennycancook.com/recipes/easy-one-bowl-chocolate-cake/
After aerating, there are two ways to measure the flour: 1) Scoop & Level – Gently scoop the flour up with a spoon and sprinkle it into your measuring cup until it’s mounded above the rim. Do not tap the cup or the container of flour. Finally, level off the excess flour with the back of a knife. 2) Dip & Level – Gently dip your measuring cup into the flour until it’s mounded above the rim and level off the excess flour with the back of a knife. A properly measured cup of flour weighs 4 1/4 ounces.


Can (and how would I) mix garlic and rosemary into the dough?
Please see the FAQs.
https://www.jennycancook.com/no-knead-bread-solutions/
When you sat 1/4 top active yeast, is is that dry or after you activate it?
This came out so tasty! Thank you for sharing this delicious recipe. I added some fresh chopped rosemary and love the added flavor.
I do not see a teaspoon of sugar…….can one add it if they desire?????
Yes, you can. Also, you can find other addition ideas here:
https://www.jennycancook.com/no-knead-bread-solutions/
This bread is delicious and so easy to make! My favorite go-to bread recipe!
Why does my bread fall apart when using for sandwiches ?
Would it be ok to combine flour, yeast salt and water in my Kitchen Aid mixer? Don’t want to make a mistake if it’s better to combine by hand.
This is the second time I made this and this time I made English muffins on the stove griddle. I had also put the dough in the fridge overnight and made the muffins in the morning after letting it rise for an hour or so and warm up. I did not do any extra folding, kneading, or anything . They came out great, thank you!
Could you use this recipe as pizza dough ? If yes would you do everything the same ?
Please see this related recipe: https://www.jennycancook.com/recipes/easy-pan-pizza/
Hi Jenny,
I’ve been making this recipe once or twice a week for my family for over five years. Thank you for sharing your knowledge and the excellent, clear video (re: Faster No Knead Bread) — it shows exactly how to achieve such perfect bread
🙂
I couldn’t figure out why my bread did not rise well. The recipe says 1/4 teaspoons yeast. After watching many bread recipes, I find 2 1/4 teaspoons is used. I used the 2 1/4 and it PERFECT every time .
Can you give a carb content for this bread? Thank you!
1/27/26 – Question – With your process can I do the Stretch and Fold Method?
Thank you for the recipe, why did mine turn out a bit doughy?
Please see the FAQs.
My bread turns out very hard . I bake for 30 minutes in covered Dutch oven and 12 minutes uncovered! Help!
The solution will likely be here:
https://www.jennycancook.com/no-knead-bread-solutions/
WOW! I made this bread hoping it would turn out decently. It turned out great! So easy and great results. !st time I’ve made this bread recipe and it was so nice and crispy outside and soft and chewy inside and very easy to make. My Active Dry yeast took 4 1/2 hours to rise, so next time I’ll try Instant yeast, but no big thing. I’m a senior citizen guy and I am so very happy with this bread. I’ll be making this bread very often. Thank you. God Bless. Bob
I have made this bread many times. I tried making it in an oven safe frying pan. No lid. I’m hopeful that it will work.
I would like to make this bread by leaving it overnight in the fridge to increase the probiotic value fermentation. Have you tried this and does it work for this recipe?
This is addressed at the top of the recipe.
to all that do NOT get the crispy crust,take an oven safe small container and add an ice cube to it,place in oven when putting bread in oven,this will creat steam and give u a crispy crust
I think everything about the bread and Jenny are spot on. I’m an old fat man who just started making bread thanks to this video. I find it very relaxing and satisfying on top of being super easy. Thank you nice lady!!
Thank you so very much for sharing your skills and baking knowledge! I just bought a pottery bowl to bake bread in but it doesn’t make the hard crust that you have made in your “pot”, so I am now buying a enameled pot to bake bread in. It looks very easy. Thank you from MN.
Has anyone tried making jalapeno cheese bread with this recipe using chunks of Pepper jack and sliced jalapenos?
I watched your video in YouTube and I follow all your instructions. It was so easy and my sourdough bread looks like your bread too. It was so good. I would like to ask if I can add a melted salted butter together with the dry ingredients then followed by the hot water mixed with 1 tsp honey. Please reply for I’ll be making again now. Thank you so much. And I’ll be making your crusty roll after the sourdough bread.
This bread recipe is fabulous so if you wanna double the recipe and are you able to let stand over night?
Someone mentioned making this bread for thanksgiving. If you want to use this recipe for rolls, I found it better to substitute half the water with whole milk and add in olive oil. Then do the first proof the same as in recipe. Then put the dough in cupcake tin (evenly distributed). Be sure to oil the tin before putting in the dough. Then let second proof happen in the tin. Then cover with foil with enough room for rise when baking. Bake at 450 but less time in over. Seems like it takes about 25 to 30 minutes. I tried a few different ways and this seems to work the best for me.
That’s so nice of you to share this with all of us. Happy Thanksgiving!🍁
This recipe is just awesome. I had a few months off from work due to a hospitalization incident and I was able to enjoy trying new recipes since I normally don’t have the time to do so. I’ve made this three different times now, each with different mix ins. It’s never a disappointment! I’ll keep making this bread going forward on the weekends when I return to work.
Thank you, Jenny for a great and easy recipe. I borrowed a Dutch oven pot from my daughter to try it and I said if I was successful, I would get one for myself. The bread came out amazing and did not last long around my boys. I’m looking forward to making fresh bread for Thanksgiving.
This was my second loaf of bread that I tried, and it was perfect in every way. The other recipe was more labor intensive, and it came out dense and bland. This was delicious, with a perfect texture, and so easy.
If I want to add chopped rosemary and garlic how much and when would I add it. I assume when I’m mixing the flour and water.
That is correct. It’s also addressed in the FAQs.
Started making this in 2021. The evolutions for me: went from 1/4 tsp yeast to 1/2 tsp yeast. Added:
1 tbsp poppy seeds
1 tbsp sesame seeds
1/4 cup pumpkin seeds
1 cup thinly shredded pecorino romano cheese
Hearty, delicious! Thanks for helping me get started with no knead bread!
Virtually all “no knead” breads are minimally kneaded. Just watch closely. Not kneaded by hand, but kneaded with a spatula or bench scraper. Some are folded repeatedly. That’s kneading!
JENNY! I found your YouTube channel last month and have been making many of your recipes, especially the no knead bread. You always make me smile and your videos so special. PLEASE COME BACK and make more videos… PLEASE! You have the best smile and I don’t know you, but I feel I do. You rock, girl! Thanks for helping me NOT be intimidated by making bread!!
Jenny, My sister showed my your recipe about 3 years ago and I make it all the time. I did revise a bit too. After it’s in the oven for 30 min, I remove the parchment as directed and then paint with olive oil. Everyone loves it, but the inside of my dutch oven will always be stained. Great recipe! Thank you.
Now I’m confused. I your fast no kneed bread recipe you state 1/4 tsp yeast. In your Fastest 2 hour recipe you have 2 tsp in the recipe, yet above, when someone asked you about it this morning, you say it’s ONE tsp. Did you mean 2 tsp for the fastest 2 hour recipe?
Thank you for noticing my typo. They are 1/4 tsp and 2 tsp respectively. I will correct that immediately. Thank you.
Can I use King Arthur bread flour in place of AP flour?
Yes, any bread flour will work.
Help I have a 14” Dutch oven how would I revise the recipe?
I don’t bake. But this excellent recipe has never failed me. I add a good sprinkling of Kosher salt over the crust before baking. My husband wants this bread every day. It’s such great bread!!
Thank you, Jennie! ❤️
Hi Jenny. I’ve been making your rustic bread for about 3 or more years and noticed the latest recipe changed the amount of yeast from 1 packet to 1/4 teaspoon. Is there a change or error in the new edition? The older recipe was perfect! Please clarify since every other measurement remained the same. I rely on your baking skills, I couldn’t do it properly otherwise🙄.
No changes were made. They are two different recipes: My original “Faster No Knead Bread” has always called for 1/4 teaspoon of yeast and then my “2-Hour Fastest No Knead Bread” has always called for 2 teaspoons.
Hi Jenny I made this bread the crust is delicious but inside is wet? Not sure what I did wrong I don’t have a Dutch oven put it in enamel round roaster the top just sits on top not heavy?
Please see the FAQs.
https://www.jennycancook.com/no-knead-bread-solutions/
I have made your recipe for over the last 8 years! It is my pride and joy because I’ve made it for family friends people that have been sick etc. Every reason you can think of and it is brought me joy because it turns out so delicious. I’ve made cheese asiago bread with the bagel seasoning. I’ve made walnut cinnamon raisin bread that’s been amazing, as well, your regular bread.
I have now come to a place where I have family that can’t have the gluten. Does anyone recommend
what flour to use to make this bread gluten-free?
If I tripled the quantity for how long it takes to bake?
Also for double?
Hi Jenny Great Bread recipe! Made it many times. It’s Great out of the Oven and sometimes the 2nd day. What is the best way to keep that Bread Fresh?
Thanks Frank
https://www.jennycancook.com/how-to-store-homemade-bread/
I love, this recipe. I made it early this morning and it’s been sitting about three hours. We decided to eat out tonight and I’d like to make it tomorrow. I used hot water-can I just let it sit or shoujd I put in the fridge for overnight?
I suggest refrigerating it overnight.
Can you add acv to this recipe
I love the bread
Thank you
I have been making this since 2020 and love the bread. Sometimes I add rosemary or thyme and I sprinkle sea salt on the top.
First time I make bread and it came out AMAZING thank you for sharing 🥰 everyone in the house enjoyed it and we had a sandwich night.
I’m learning to bake bread noticing many recipes specify the type of salt and most I’m seeing use Kosher. Yours doesn’t so I’m assuming you mean table salt (?) I’ve tried several of your other recipes and know this one will be great but I am sort of ” by the book” and want to make sure before I start.
I use table salt. Good luck!
I make the Bread all the time and love It, but the next day it is hard. Do I reheat it?
https://www.jennycancook.com/how-to-store-homemade-bread/
It makes great toast the day after, also awesome French toast
I make th Bread all the time and lov It, but the next day it is hard. Do I reheat it?
I made bread for the first time and it came out really dense. What did I do wrong
Please see the FAQs.
My dad makes the best sourdough ever. It is so soft. We love sourdough so we will definitely try this Recipe. He made garlic with olives sourdough bread and it was so good.😋
Has anyone tried to add fresh garlic to this recipe?
I have used fresh garlic a couple times. It doesn’t always come out “roasted” so if you’re looking for a roasted garlic flavor than I recommend roasting the garlic ahead of time.
I read somewhere that adding salt before the yeast activated, can hinder the yeast’s ability to make the bread rise. Have you ever experienced that?
You just need to incorporate the salt and yeast into the flour before adding water.
Can this be used for cinnamon rolls? If so how would you make it work.
Do you have any recommendations for doubling the recipe for a larger loaf?
I have never doubled it but some people in the comments have.
I have added another 1/2 C of liquid & 1 C of flour. I also do about 7 ml of salt I bake it 40 minutes with the lid on it
Can I use rye flour to make Rye Gread??
https://www.jennycancook.com/recipes/no-knead-rye-bread/
We make this once a week it’s extremely easy and delicious!
Thank you for consistently providing material that surpasses expectations!
I live in Hawaii so altitude may be different however, I used a cheese cake pan and lined it with parchment paper..450 for 40 minutes.
It was Beautiful! Wella……..❤️ thank you!
After 3 hours, the dough poured out onto the counter almost like pancake batter??????
This might help: https://www.jennycancook.com/no-knead-bread-solutions/
I don’t have a cast iron Dutch oven Can I use an aluminum Dutch oven?
Please see the FAQs.
Yes, I have used a non-cast iron dutch oven and the bread still turned out beautifully. 🙂
Anyone ever make this in altitude? I baked it but it didn’t look the same -tastes the same though
Please see the FAQs.
WHAT IS THE DIFFERENCE BETWEEN AERATING FLOUR AND SIFTING IT. I AM VERY USED TO SIFTING BEFOE I MEASURE. SO NOW WHAT DO I DO? I DON’T WANT TO “SIFT” IT, SO PLEASE ADVISE. THANK YOU ASAP PLEASE I’D LIKE TO TRY THIS THIS YEAR HAHA. SMILE.
https://www.jennycancook.com/how-to-measure-aerate-flour/
I have made this recipe at least 30 times. I have made this on a pizza stone, in a loaf pan, in a Dutch oven and in a regular, SS pot with a lid. With 1 exception, this bread has been amazing EVERY TIME. The 1 failed attempt was definitely old yeast. I am honestly baking one right now. I can’t get enough! Thank you Jenny!!
I made your recipe 3 times and was very happy with the results! Sooo easy🙂 and very good texture and crust. I am experimenting adding 1 cup of sourdough starter with great success. Just have to make sure the starter is approx same consistency of the final bread dough before baking. I leave the dough for a few hours longer so the wheat flour is more thoroughly digested and thence better for you if you have an issue with eating wheat….
Quick question- this is the same as the recipe I use for overnight no-knead bread except for the water temperature of course. The only other difference is that my recipe calls for 1/2 tsp. yeast and yours says 1/4 tsp. Does it matter and why?
Very easy recipe, always adding sunflowers seeds or different seeds. Tasty bread anytime I make it.
This my favourite bread recipe, when do you add the seeds and how much?
The bread did not rise. I used hot water at 125 degrees, against my best judgement. Completed the process and was a waste of resources and time. You do many things well Jenny but this is not one of them
I just made this bread last night. Before you blame me, please see the FAQs to see what went wrong.
https://www.jennycancook.com/no-knead-bread-solutions/
I’ve been making this recipe for years and it has always been awesome. All my friends and family love it. I’ve even made it with variations adding sweetness. Do not give up it is the easiest thing I’ve ever done. You must have done something wrong. Or perhaps your yeast is old??
either your yeast is crap or the water too hot. I use 90*F and it works every time.
Hon it’s something you did wrong could have been your yeast. This recipe turns out great every time if the right ingredients are used. Could have been the temperature in your house. If it’s raining sometimes bread won’t do well.
I first saw this recipe on YT, and then use this link when I make it. I might have already left a review, because Oh My! You made it less intimidating for literally ANY one to make this and it come out perfect EVERY single time! I’ve made it dozens of times, always great, especially when I’m feeling lazy! Just follow the very simple recipe!
It’s a recipe that will last the ages, and I thank you so much for sharing and encouraging people to be amazed at what they can do.
It’s not “just bread”, it’s a whole mindset.
I now try all sorts of bread recipes and have become a pretty decent baker due to your introduction of this simple recipe.
You are a bright light, keep up the great work!
I use to make your over-night no-knead recipe. Can I use the 4 hour recipe and just let it sit out for 12 hours?
Yes, with cool water. Please see the description at the top.
HaHa, you mean read the directions? It is my favorite recipe. I am making the cranberry walnut bread version.
There was one big problem with this bread recipe—IT IS WAY TO HARD TO LET IT COOL BEFORE SLICING!!! OMGoodness this bread is amazing. We love the hard crust with the super soft texture on the inside of the bread. Even more, I love how easy it is to make! The first time I made it, I made a big pot of soup to go with it. We ate so much of the bread that we were unable to finish our soup. I’ve made it many times and it always comes out perfect. It is super great just to have with fresh butter and jam. I’ve made it for numerous of my friends, and they all wanted the recipe. Thank you so much for introducing me to the wonderful keepsake recipe!!!
Jenny, I have been making your “buns” using this receipe for a few years. I finally decided to get a Dutch Oven and make this bread. I picked up the dutch oven from the store and it was so heavy that I had to take it back. At 85 I can not lift that kind of weight, so my wife, of 61 years, purchased a lighter one from Amazon. I am in the process of making this now and using my new
granitestone dutch oven for the first time. I hope you are well …I have enjoyed your Youtube presentations. Ron Hofmann
Watched the YT video and decided to make this today, followed the recipe but did use Bread Flour (king arthur). It was just like the video and easy to do while home for the day. Great way to make use of the Dutch oven we got for Christmas. We might add more salt next time, but otherwise very happy with this. Thanks!
Hi ther i tried this recipe an my 1st time making bread ever, an it was great. Question is can the dough be frozen an cooked later. I thought putting the dough in the parchment paper an freezing it would be an idea then take out an let defrost an come to room temp then cook any suggestions or thoughts on this 🤔