These easy patties are one of my go-to meals because they can be ready in less than 20 minutes and they always satisfy. Here’s how I do it. First, I pound the chicken between plastic and most of the time I use a plastic produce bag. Definitely use plastic because it’s less cleanup and you won’t get chicken splatter all over the place.
Then I lay out a long sheet of wax paper with a bowl in the middle. The flour goes on one side and the bread crumbs on the other (I use my homemade whole wheat crumbs). I use a fork to stir the salt & pepper into the flour. I zest the lemon and chop the parsley, adding them to the crumbs. Then I juice the zested lemon and add the 2 tsp. of juice to the egg.
Now my assembly line starts. I dip the chicken in the flour, the egg, and the crumbs. What I find is that the parsley seems to mostly disappear from the crumbs before I’m done so I keep a little extra parsley on the side and stir it into the crumbs later when needed.
It doesn’t take much oil to make these cutlets nice and crispy and I only add a little at a time when turning the cutlets over. I have a really big fry pan I got at Target (10 inches across!) but I still have to work in batches. If you crowd the chicken in the pan it won’t brown as well and they won’t be as crispy.
This recipe is quick so I always start my side dish first and that’s usually my spaghetti with chard or rice with kale. But last night I made Greek spinach rice and it went great with the chicken cutlets. I will post that recipe soon. Breaded chicken cutlets are one of those flexible recipes you can make your own. Do you like rosemary? Add some dried rosemary to the crumbs. No lemons? Just leave them out. Like things spicy? Add some cayenne to the flour and serve with hot sauce instead of lemon. Using this basic formula you can add any dried spices you like to either the flour or crumbs. But I hope you’ll try it this way because it will probably become your family favorite too. Click here for the recipe. – Jenny Jones
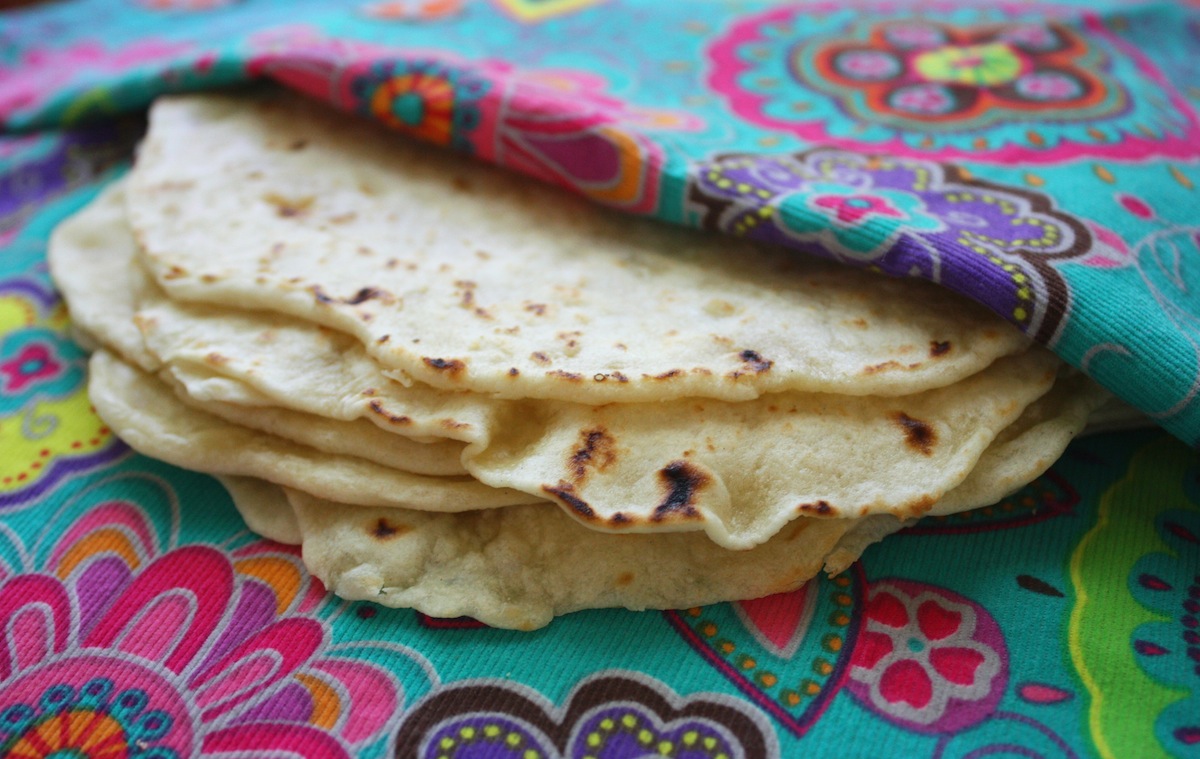
This is my Sunday routine… having some green tea and making tortillas. Ever since I started making my own homemade tortillas, I have never bought them at the store. They are just so much better, especially when you eat them fresh right out of the pan. Wow! I always enjoy making them for someone who has never had one that’s homemade and watching their expression when they take the first bite. I always tell them, “This is what tortillas are supposed to taste like.” Then they ask for the recipe.
Once they’re made, I store (what’s left) in an air-tight zip top bag, refrigerated. There’s so much you can do with tortillas. Roll them up with scrambled eggs for breakfast (that’s happening right now), make quesadillas, or tortilla pie, or any rolled up sandwich. Or just slap some butter on them and enjoy. So that’s what I made today. …just sharing… – Jenny Jones
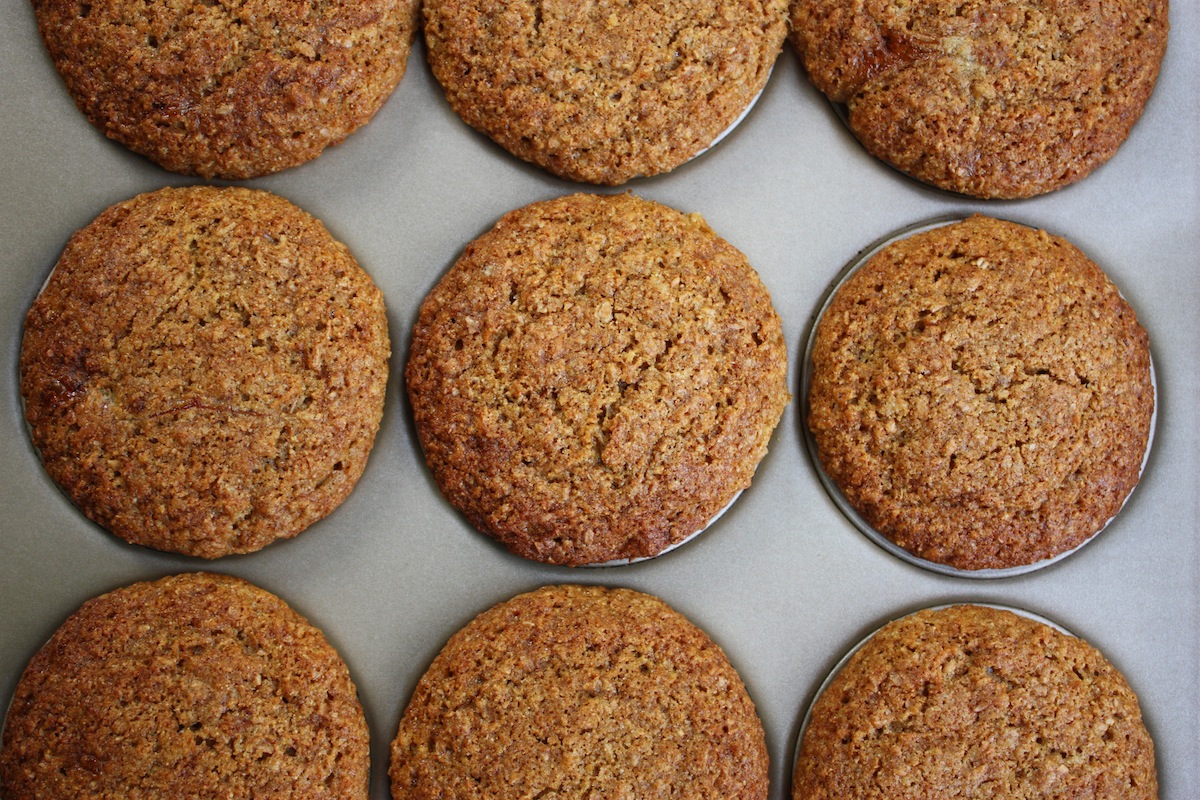
On the menu this morning – bran muffins. And I’ll tell you why you should try this easy recipe. We all need fiber. You could try one of those cereals with tons of fiber — you know, the ones that taste like particle board chips. Or you can make your own delicious bran muffins, which by the way, are very portable for breakfast on the go.
Fiber is associated with a lower risk of heart disease, stroke, hypertension, diabetes, obesity, and gastrointestinal diseases. Fiber also promotes regularity and can prevent constipation and hemorrhoids. By the way, when you increase your fiber you also need to increase your water intake. So I had one and a half muffins for breakfast with a big cup of green tea and some peaches. And that’s what I cooked today (so far). …just sharing… – Jenny Jones
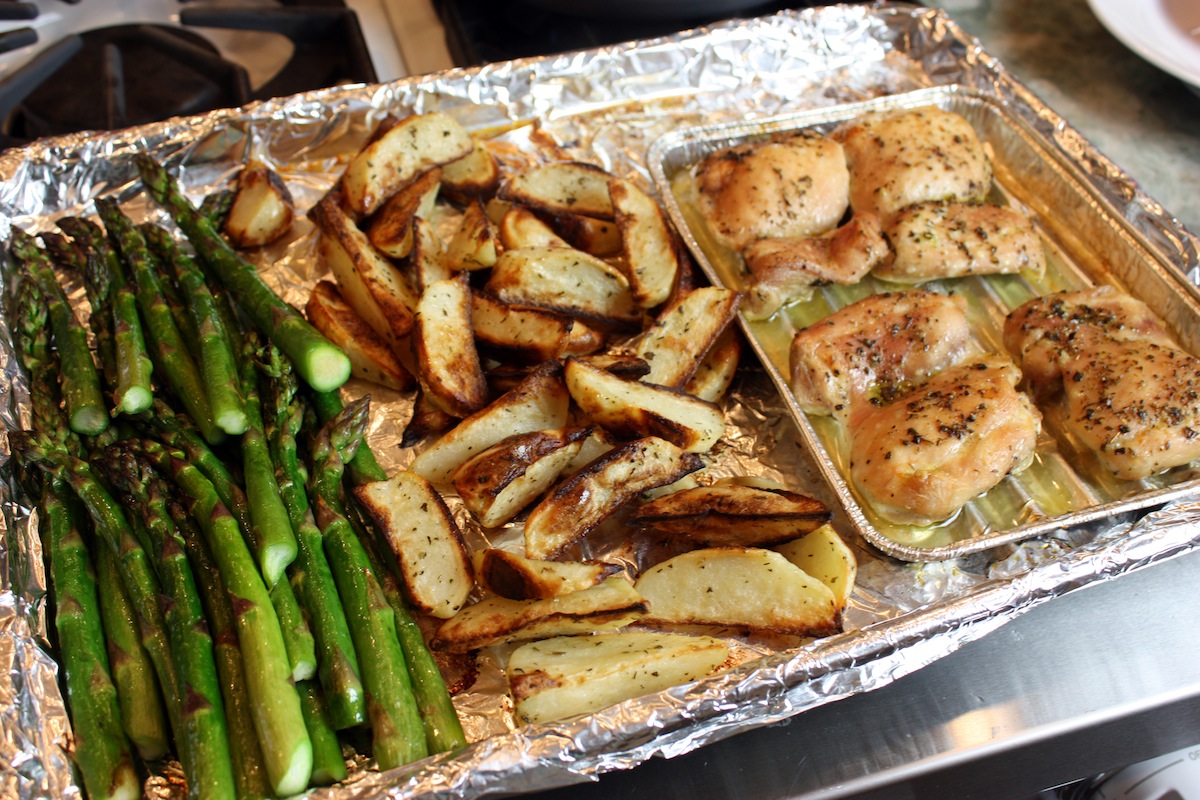
Here’s a snapshot of dinner today, my one-pan thighs and fries made with skinless chicken thighs, lots of potatoes, and asparagus. The recipe may seem complicated on paper but it’s really easy and there is no cleanup. None. I’m posting this so you can see how it looks on the pan. I line my rimmed baking pan completely with foil. Then I place a disposable broiler pan at one end. This broiler pan is needed because all the fat will drain off the chicken thighs and it will stay in the broiler pan and not spread onto the potatoes.
After coating the chicken and potatoes with an easy mixture of olive oil and spices, I put the chicken thighs in the broiler pan and the potatoes on the rest of the baking pan. Then it bakes in a 425 F oven for 45 minutes. The potatoes get crisp and the chicken gets tender. After that you just push the potatoes over to make room for asparagus (or green beans). Then back in the oven for another 10 minutes and it’s done.
To serve, I lifted the chicken off the broiler pan with tongs, scooped up some potatoes and asparagus and we had a fabulous dinner. Then I threw away all the foil and only had to wash two dishes. So that’s what I cooked today. …just sharing… – Jenny Jones
I try to be good, I really do. But I made my amazing cinnamon rolls for brunch today. Well, it wasn’t really brunch – it was just breakfast but when I put cinnamon rolls on the table, it became brunch. Isn’t that why we all love going to brunch? “Let’s get the eggs and omelettes over with so we can get to the sweets!”
So that was me this morning, having my obligatory scrambled eggs and whole grain toast to clear my conscience in preparation for cinnamon rolls. Boy are they good! I see why so many people love this recipe. It’s easy and you can actually make this recipe with no butter at all, which is what I did. I used Canola Harvest instead of butter for the filling and didn’t miss the butter at all. Click here for the recipe.
These sweet rolls are soft and gooey and they smell amazing. I used Saigon cinnamon, which is more potent than the popular Ceylon cinnamon and I highly recommend it. Anyway, there’s only half a pan left now and that won’t be around long since I’m having it for dessert tomorrow.
Today I also made my ribs and potato salad for dinner so we’re having leftovers tomorrow. Tomorrow is going to be a good day with ribs, potato salad, and cinnamon rolls for dessert! And that’s what I cooked today. …just sharing… – Jenny Jones
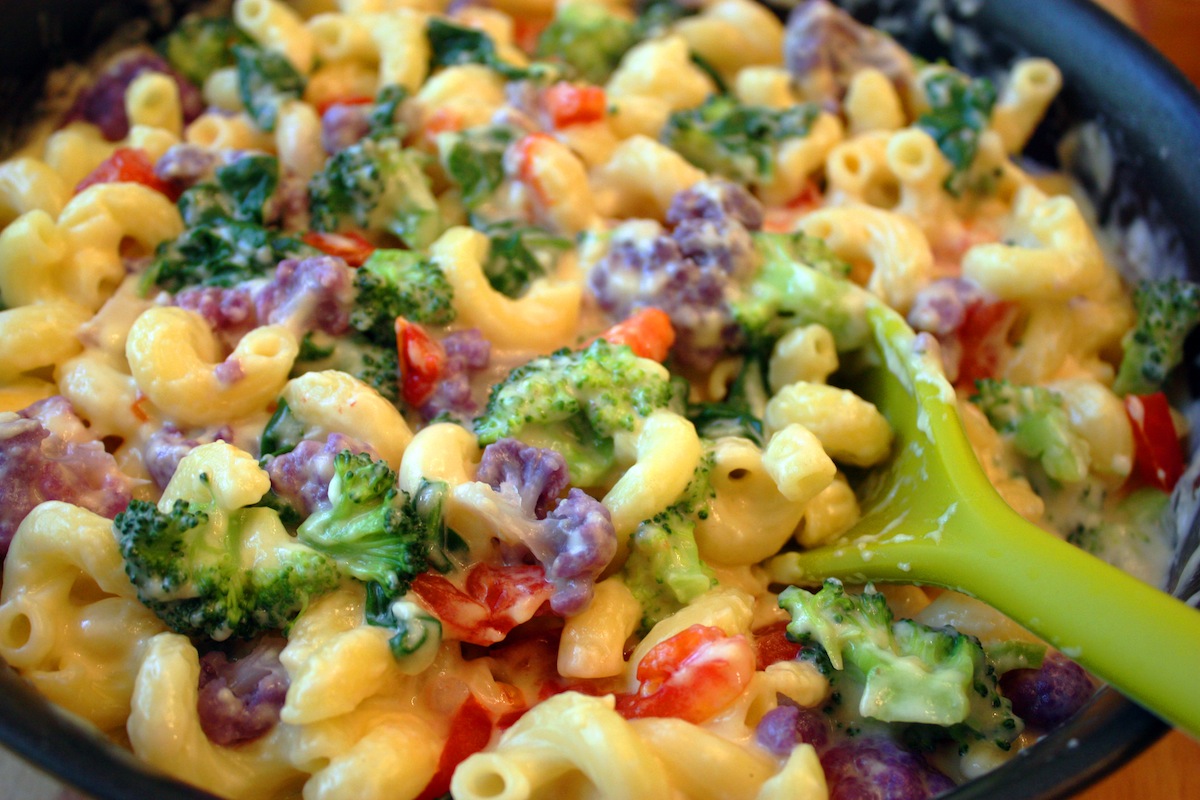
I LOVE this dish. I’ll say it again. I LOVE this dish!!! It’s easy to make and has three vegetables (broccoli, cauliflower,and tomato) and everything is coated in a light creamy, cheesy sauce. It’s mac & cheese for grownups but don’t you think kids would like this too? If they’re picky, use white cauliflower and they’ll never even see it. It’s soft and blends right in with the pasta. If you make it, let me know if it passes the kid test.
It’s important to do all your prep first because everything cooks quickly. It won’t take long if you buy the already-cut vegetables but I cut all of the veggies myself. The prep includes cutting the vegetables, shredding the cheese or slicing it really thin. Hey, you’ll be cutting the cheese!
Speaking of cheese, please don’t buy pre-shredded cheese. It has an additive and will never melt as well as a block of cheese. I’ve made it with reduced fat cheese and whole milk cheese.
This recipe is similar to my Quick & Easy Mac & Cheese but with less pasta and added vegetables but it’s still a quick and easy dinner. I wasn’t sure what to call it… veggie mac & cheese or mac & cheese with vegetables or maybe rainbow mac & cheese. I decided on “Grown Up” because we grownups know how important it is to eat vegetables at every meal. And if they’re buried in my delicious mac & cheese, it’s a win-win. Click here for the recipe. – Jenny Jones
This morning I baked my simple whole wheat bread and I forgot just how easy it is. It’s only one rise and the whole thing, start-to-finish, takes just an hour and a half. It’s a soft loaf, perfect for French toast. That’s what I plan to make with it tomorrow. Today I just sliced it while it was still warm and put a little butter on it and had it with scrambled eggs.
I love homemade bread… the smell… and the taste… you just can’t buy it anywhere. I also made homemade tortillas (they disappear quickly around here) and I also worked on my Polish bigos recipe. … just sharing… – Jenny Jones
When I was growing up in Canada, there was no Mexican food. No Mexican restaurants, no Taco Bell… not even corn chips. All we knew was salmon sandwiches and cabbage rolls… and that weird jellied thing my dad used to make with pigs feet. The first time I went to a Mexican restaurant I was 20 years old and living in California. (there are a LOT of Mexican restaurants in Southern California!) And they always have salsa. You don’t even have to ask for it. Sit down — there it is. Salsa on the table. And a bowl of tortilla chips usually arrives at the same time. It’s supposed to be an appetizer, chips & salsa, but I can’t stop eating it until someone takes it away.
It turns out that it’s really easy to make fresh tomato salsa. They call it Pico de Gallo but I don’t know why. It translates to “rooster’s beak.” You hardly need a recipe because even if you just eyeball the amounts, it will still be great. It’s a simple recipe using only fresh ingredients (tomatoes, onions, jalapeño pepper & cilantro) In fact, feel free to use more or less of any ingredient or customize it with some fresh garlic or a spicier pepper like serrano.
It just takes a few minutes to make. Some people use the whole tomato including the seeds and juice but for me the result is a salsa with too much liquid. I prefer a more chunky salsa to I remove the seeds from the tomato first, then I dice tomato and drain it in a collander or strainer while I work on the other ingredients. And a word about tomatoes. They should not be refrigerated so if you want an amazing salsa, use fresh tomatoes that have not been refrigerated and serve the salsa right away. Oh, one more thing: the seeds and insides of jalapeño peppers are very spicy so don’t handle them and then touch your eyes. In fact, it’s good to use gloves to seed and chop them if you can.
In case you have some left (I rarely do) you can refrigerate it for 2-3 days and it will still be good, but more like the kind you buy in a jar. If you like Mexican food, try my salsa. If you don’t like Mexican food, try my salsa anyway. Es muy buena! Click here for the recipe. Haga aqui para la receta. – Jenny Jones
Tuesday, February 17th is Pączki Day! It’s a day celebrated by most Poles by eating as many pączki as you can in preparation for the following day, Ash Wednesday, the traditional start of Lent, when many Catholics start fasting until Good Friday. So if you’re going to binge on pączki today, why not keep it healthy and bake them? My recipe is easy and you can fill them with custard or jam… I even fill some with my chocolate pudding recipe. (a single pączki is called a pączek.)
So Happy Pączki Day, everyone. And Szczęśliwa Pączki Dziennie to my Polish friends! Oh, and Happy Fat Tuesday to everyone in New Orleans. That’s about the happiest place to be today. Click here for the recipe. – Jenny Jones
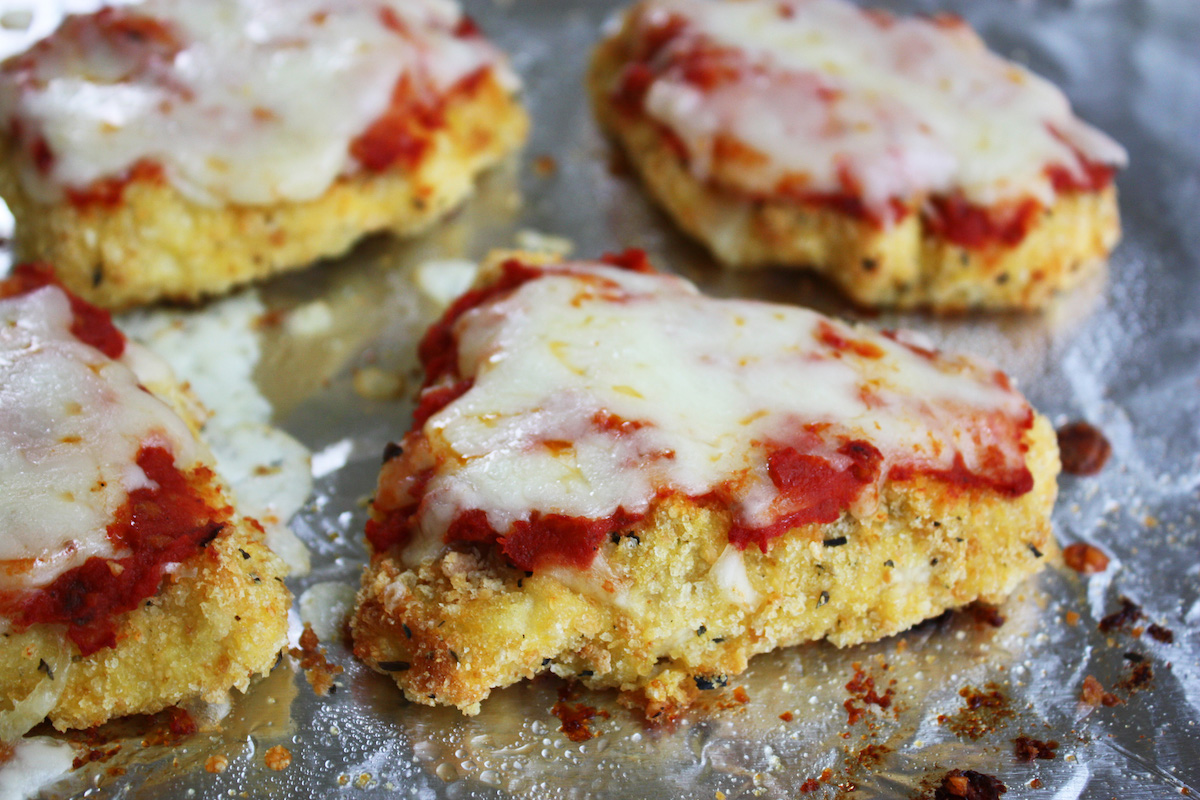
There’s almost no cleanup with my easy chicken parmesan recipe. The prep is all done on wax paper and if you line your baking sheet with foil like I do, you won’t have to wash it. This recipe will convince you that frying is not necessary to make a fabulous chicken parmesan. First I pound the chicken to an even thickness of 1/2-inch. That’s to make sure it cooks evenly. Then I dip each piece in flour, beaten egg, and finally coat it with (homemade) bread crumbs that I season myself.
I start with plain breadcrumbs and season them with a store-bought Italian seasoning mix. Then I add parmesan cheese and it makes an delicious breading for these chicken cutlets. They bake for 20 minutes… oh hey… that’s just how long it takes to make my quick and easy marinara sauce, start-to-finish. After 20 minutes, top it with some sauce and shredded mozzarella cheese, bake a few more minutes and… yummm! I always shred my own cheese because packaged pre-shredded cheese does not melt as well.
The last time I made this I baked it at 425 for 17 minutes and it was a bit more crispy but it’s not much of a difference. This photo above was baked at 425. Let me know if you try the higher temperature.
Who doesn’t like chicken parmesan? Now you can make a healthier chicken parm topped with part skim mozarella to keep it low fat and light. This is truly Italian comfort food. Click here for the recipe. – Jenny Jones