

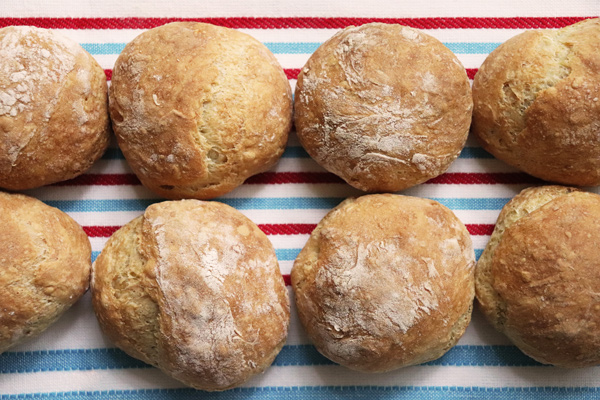
2-HOUR Crusty No Knead Rolls
These rolls depend on a very hot oven (450° F) for the initial blast of heat. My oven takes 35 minutes to reach 450. The best way to be sure is to use an oven thermometer. Always aerate (not sift) your flour before measuring! - Jenny Jones
Prep Time: 10 minutes
Cook Time: 30 minutes
Total Time: 2 hours
Makes: Eight rolls

Ingredients:
- 2 1/2 cups all-purpose or bread flour
- 1 1/2 teaspoons instant or RapidRise yeast
- 1 teaspoon salt
- 1 cup + 1 Tbsp hot water, 120 - 130° F (up to 1 1/4 cups if dough is too dry)
- (about 2 Tablespoons extra flour for shaping)
Instructions:
- Combine flour, yeast, and salt in a large bowl. Stir in water until it’s well combined. Dough will be fairly thick.
- Cover with plastic wrap and let stand at room temperature for 1 hour. Towards the end of the hour start preheating the oven to 450° F.
- Transfer dough to a floured surface and sprinkle with a little flour. Using a scraper fold dough over 10-12 times & shape into a rough ball.
- Using the scraper cut dough into 8 pieces. With floured hands, shape each into a ball by folding and tucking, like making a drawstring bag. Dough will be sticky.
- Place smooth side up on a parchment paper-lined baking sheet (not wax paper) & cover with a towel. Let stand at room temperature for 15 minutes. They will not double in size. (Let stand longer if oven has not reached 450).
- Bake for 30 minutes until golden brown.
- To re-crisp the next day, preheat the oven to 325° F and place the rolls directly on the oven rack for 10-12 minutes..
To Freeze: They freeze beautifully. To re-crisp, place frozen rolls directly on the oven rack in a preheated 325° F oven for 10-12 minutes. They'll be even more crispy than first-baked!
Click here for more on these rolls in my blog.
Great rolls, awesome crust, and just two hours. I started reading the 4 hour recipe, then switched to the two hour recipe link at the end of the directions. Absolutely wonderful. I read all the comments regarding the bake time and tweaks to prevent baking too long. Here is what I did and they came out perfect.
Baked at 440 degrees, for 20 minutes, used two layers of parchment paper, and put a second pan on the lower level to diffuse the heat. They came out perfect. I think the time was probably the biggest factor. The crust was brown and crisp, not too hard, and the bottom was lightly browned. I’ll make a double batch next time. Thanks Jenny.
Can I bake these individually in a 12 oz ceramic ramekins with lid?
Theses rolls are crispy instead of airy. My husband loves them. They are crispy on the outside and soft on the inside. They do not have a lot of rise to them but they are delicious.
Just curious! Why do these rolls not rise after forming? Will they rise while baking?
I decided to try baking these in my air fryer since it heats up much faster than the oven. They came out perfect.
I followed the recipe until the rolls were shaped. Then I preheated my air fryer to 400, its maximum setting. That took about 5 minutes. I have a 6 quart machine and might have been able to fit all the rolls in it, but I decided to bake them in 2 batches. Each batch finished in 14 minutes.
Recipe says 30 minutes @450 degrees. Mine was done in 20 minutes. Might want to check in 20 minutes if you use 30 minutes.
I have your original recipe for these rolls as well. I noticed the ingredients are pretty much the same except for the amount of yeast. How does the amount of yeast affect each recipe? These rolls are absolutely delicious by the way!!
A QUESTION:
Has anyone ever made used this recipe and made it into a LOAF BREAD resembling an ITALIAN OR FRENCH LOAF, (no pan involved) instead of the rolls? I ask because hubby loves this roll recipe so much and wants me to try to bake a loaf instead of the rolls. If you have, please share the temperature, time to bake and sheet pan used to bake the loaf. Thank you.
PS………I make these rolls all the time, triple the recipe, and freeze them.YUM. I also put an extra sheet pan on the lower rack and use two sheets of parchment paper so the bottoms won’t burn. Solved my issue with burned bottoms.
Try adding two ice cubes to cookie sheet….the evaporation will soften the crusts….works great on Jenny’s regular loaf
I’ve made you no knead bread many, many times and it always comes out great. The rolls, the first time I made them, came out too well done. And I took them out at 28 minutes. Making a new batch today and plan to only bake for 20 minutes and check. Thank you for the wonderful recipes.
Easy to follow recipe and the rolls have a wonderful crisp crust and nice crumb. They freeze well. I pop one in the microwave for 20 seconds when I’m too impatient to use the oven and the crust gets a really good mouth feel similar to a bagel. Thank you Jenny, this has become a new staple in our home.
Hi Jenny,
I’ve been following your recipe as directed but for some reason my crust comes out extremely hard! What do you suggest I could do?
Thank you!
Ny hsb loves them hard and crusty. I tried one in the Microveway, but the softness only last less then 1 minute. you said they froze good, will I’m going to find out. Use a lot of your recipes, especially the meat loaf.
Jenny
Can you use whole grain flour for this recipe, or half whole grain?
Thanks
We make these using 1 1/4 cups bread flour and 1 1/4 cups whole wheat flour. We also add 1/2 cup mixed seeds (sesame, poppy, etc), 1/4 cup oats and 2 tablespoons agave syrup in addition to cutting the salt down to 1/2 teaspoon. This adds extra nutrition and cuts down on the sodium but substitutes with just a hint of sweetness from the agave – perfect for us!
I have made these time after time and they are easy and delicious. Only problem is that no matter how low (I’m down to 425 now) the bottoms burn. I put the pan on the top shelf of my propane-fueled oven. How can I get these rolls to not burn on the bottom?
I wonder – I’ve been letting these rise for two hours instead of the one hour. Could that be why they burn on the bottom?
Try stacking 2 (lipped) baking sheets – one on top of the other, so there is air space created between them. This way there is no direct heat on the bottom of the baking sheet. I learned this method for baking in my propane RV oven that tends to burn the bottom of anything I try baking.
To avoid over cooking (burning) the bottom of the buns I put a baking sheet on the rack below to defuse the heat. Works well.
Vicki – I would suggest slipping another flat baking sheet under the pan that holds your rolls. Place your baking pan with the ready rolls in the hot oven, set a timer for maybe 6 minutes, then quickly and carefully pick up that pan and slip another baking pan under. It will act as insulation. I suggest the wait time, as you don’t want to interfere with that first initial blast of baking heat that helps the final yeast rise and ‘sets’ the outer crust. I hope this helps. This is a technique I have used for years. These rolls are so fabulous, we don’t want anything to interfere with enjoying them!
Apologies to Tracer, I did not see your comment before I typed!
It’s good to see more than one similar suggestion. It’s a good indication that it works and this is a great tip (I never knew this either).
Try using 2 baking trays
Well, this was my first attempt. Like many other comments, mine were pretty hard. But the inside was perfect and they tasted great and they looked beautiful. I will experiment more. Any suggestions regarding olive oil, butter or any other ingredients to soften them up? BTW, I have used your recipes in the past, and I am a fan!
Rolls are supposed to be crusty outside
Many recipes, as does this one, use parchment paper at 450 degrees, but the parchment paper is safe up to 425 degrees.
I’ve used parchment safely at 500 F
Interesting since the ignition point for paper is Fahrenheit 451.
Parchment paper will start to burn at 450°, depending on what you’re cooking and what’s being released, it can safely be used up to 500°. It will start to brown and curl even at 400゚.
I look forward to trying the recipe
I’ve made these a handful of times now. I went about half way between these and the soft rolls. Instead of 1c +1Tbsp water, I used 1/2c of whole milk plus 1/2c 1Tbsp water. Also, my oven runs hot, and we’re at about 6700ft. Baked at 430° for 20 min. So good.
Hi M,
I like your suggestion on softening the crust a little. Since the recipe requires hot water, how did you add your milk? Same hot temp as the water?, or warm, tepid, room temp, or straight from the fridge? My first time making the rolls and while I love a really crunchy crust, my hubby does better with softer slightly crisp crust. Thanks!
Wow! I was here along time ago and made the original version that was like 4 hours. To my surprize I see a two hour version I was make this one last time. https://www.jennycancook.com/recipes/no-knead-crusty-rolls/ Always a hit with winter chilli!!
This was excellent! I found out a few hours before Christmas dinner that we didn’t have rolls, and I was able to whip these up quick!
Quelle serait la durée de temps si je faisais ces pains dans un petit four de comptoir……….????Merci
Vos pains sont excellents merci ……….Vous m’avez faites découvrir de faire du pain et depuis ce temps je le fais toujours……..
I’ll have to try weighing the flour next time, 1 and a quarter cups water was nowhere near enough to get as wet a dough as it seems like you intend
I know these are crusty rolls, but my rolls seemed super crusty! The inside was good though, so maybe I’ll bake for a little less time? I must say they are delicious though! Taste like the crust on Grandma’s homemade bread. So so good! So far I’ve made 3 of your recipes and they all are great! Thank you Jenny!
Made some cheddar jalapeño rolls.
What did you do exactly? How much and when did you you add cheese and jalapeños? Was it good?
I regularly make the NO Knead Bread recipe, adding a tablespoon of fried onions and about a half cup of hard cheese (shredded). A great favorite with family and friends.
Can you use this recipe with whole wheat flower too.
Thank you Bruni
I’ve just made a batch using 1 cup whole wheat and 1 1/4 cup all purpose.
had a small nibble of one, delicious. so had to finish it . try it next time with reverse quantities
Thank you very much I’m going to try it
Thank you for your bread I haven’t tried it yet but I’m sure it will come out great been watching your videos for a while you’re very beautiful thank you
The 2-hour rolls turned out delicious! Crusty on the outside, soft and chewy on the inside. Mine were not pretty as yours, I need to shape them more carefully. But overall, a nice foolproof path to fast, hot rolls!
Wow! Can’t believe how simple and delicious these are. Perfect dinner roll. Thanks Jenny!
Why do my rolls come out very hard. Any suggestions?
Mine were like rocks! After 3 perfect tries with No Knead Bread I must have been too cocky. They weren’t pretty and you could hardly bite into one So disappointed.
What happened?
Maybe when combining the hot water with dry ingredients the dough was over mixed? Or maybe they didn’t need to bake for 30 minutes? Mine came out on the harder side as well, but the inside was a good texture. I’m making again and I am going to decrease baking the time by 5-10 min and see if that helps.
I’ve seen some videos where melted butter is brushed on the top of the rolls. I think about halfway through the baking would make them a little bit softer on the outside. Mine were a little too hard but they were perfect on the inside. Thanks for the recipe Jenny!
Good idea. Thanks!
Many of my favorite recipes are from you. I love your videos and YOU!
Can we bake with convection oven? What would be time adjustment?
425 for 22 minutes convection.
They are perfect every time! I only bake 15 minutes on convection @425.
What a wonderful easy & delicious recipe, thank you for sharing. With everything I will be making for Thanksgiving, this will be a perfect addition.
Made these yesterday. They were so awesome!! We all loved them, and they were sooooo crunchy on the outside! Thanks so much for all your sharing. Where have you been all my life?????
I absolutely love all of your recipes
thank you
I just made these as last second addition to my meal and it was sooo easy and so perfect!! Crispy on the outside and soft chewy on the inside! They were gone before dinner started!!! I am Polish too, came here as a young child and often look to Jenny’s recipes because my mom never writes anything down. She just says …”little this and little that”.. doesn’t always work out. And these rolls are just like moms:).
Who’d a thought making bread was this easy? It’s so yummy but there’s one problem.. It’s a HUGE problem.. It’s so easy and yummy I make it all the time. Now I’m fat.. But I don’t care I have BREAD, ?
I divided all the ingredients in half and made 4 rolls and cooked in the toaster oven for 20 minutes. They came out perfect.
Can these crusty rolls be made with either all whole wheat flour or 1/2 whole wheat + 1/2 bread flour. Suggested quantities?
Thanks!
give as gifts ASAP or they are eaten : )
Thank you for the absolutely wonderful no knead, easy bread receipt.
My two granddaughters and grandson have made and gave as gifts.
One has to give as gifts ASAP
Fabulous recipe and video Jenny! I added kalamata olives and made 4 loaves rather then 8. Delish! Thank you!
Finally ! This recipe and the bread are perfect. Of course yeast is in short supply so I took to trying my hand at starters. Many failures later I came upon these recipes and have been able to modify with starter.
I added the everything bagel seasoning to these rolls. Wow
Thanks so much Jenny
Just made these. They came out great. I think the 30 minutes is the right amount of time. I rotated the tray half way. I only made 7- I will use a scale next time, since I’m not that good at judging dough and I was in a hurry. I used an egg white wash and sesame seeds.
I was wondering if these would work with whole wheat and/or what could I put in the dough for additional flavor.
I will definitely make these again. Very crusty, just let it bake and the inside should be done in the allotted time.
Made these rolls yesterday — turned out very nicely. After reading the online comments, decided to make 6 not 8. Aerated the flour too. Baked them at 425F for 22 minutes on the middle rack of our convection oven. Nice crispy crust and good colour, not rock hard as some have reported. Reheated 2 rolls today in the toaster oven for a few minutes for lunch with roasted red pepper soup. Just as tasty as fresh yesterday. Recipe is a winner!!!!
Can you bake the rolls in cast iron, (Thinking of the Lodge mini cake pan)
Or would they get hot and maybe burn on bottoms?
Thank you. Love your site❣️
Hi Jenny – I made this recipe once but was not able to tuck the dough into little smooth-topped balls as directed, due to the stickiness of the dough, so I kneaded the dough slightly and formed it into rolls as best I could. The rolls turned out nice and crusty but a little doughy in the center and small in size
SO – I need a little clarification about how to form the rolls: the dough is quite sticky, as you have said, but to get them to a point where they can be stretched into smooth-topped balls, I would have to add quite a lot of flour.
Would you provide a little more detail about the proper amount of flour needed to form the balls once the dough has been divided? Thanks
It’s true that the dough is sticky but the best suggestion I have is to watch the video.
I have been making your fool-proof No Knead Dutch Oven bread successfully for a very long time, averaging two loaves per week! That’s a lot of yummy bread loaves. So when when I learned that you adapted that recipe to rolls, I was thrilled. I made these rolls yesterday and want to share my experience.
First, I thought the dough seemed a bit dry after the initial mixing and again after a few hours of rising, but I didn’t make any adjustments. I thought that cutting this dough into the recommended eight segments resulted in too small a roll and lended itself more to dinner rolls more than sandwich rolls. The baking to also appeared to be too long for such a small roll and resulted in a very hard outer crust. So here is what I plan to do when I attempt my next batch of these rolls. I will cut the dough into larger segments, probably 5 or 6 segments rather than 8, and I will bake them for less time in my convection oven watching them closely until they are light golden and having a crispy rather than hard crust.
The flavor was great on my first attempt, but they seemed over baked and too small. Hopefully adjustments will produce my desired roll. I will let you know my results.
I have a gas convection oven. I am going to try 400 degrees for maybe 20-25 minutes. I put some ground sage and dried thyme leaves in the dough. FIngers crossed!
If they are overdone, you might try lowering the temperature by 25 degrees. That’s usually recommended for using the convection setting for baking.
Great recipe! I will make them again. I did have a problem with the parchment starting to burn at that high temperature and the bottoms of the bread were getting burned. I had to pull them out and swap the parchment for foil then lower the temperature. Next time I might bake them at the higher temperature for 5 minutes or so, then turn it down. Also, I had the bright idea of putting some of the Trader Joe’s bagel seasoning on top of a couple of them. It burned, but I was able to scrape most of it off. I loved the rolls! I will be making more this weekend!
Try Reynolds brand parchment paper – it will turn brown but won’t burn.
Does anyone know how many teaspoons are in a package of yeast usually? Just curious. Thank you!
Look under Metric.
One packet of yeast contains 2 1/2 teaspoons
One packet of yeast is 2 1/4 teaspoons.
I made your Quick and Easy Chocolate Cake on Tuesday and these last night and all I can say is, “Jenny can cook!” and now “Waynette can cook, too!” LOL!
Can’t wait to make rolls – loaves are fabulous
I just tried these yesterday and they are perfect! Make sure your yeast is fresh. Then just follow the recipe exactly as written and you can’t go wrong.
Sorry to ask but I would like to know if using regular active dry yeast instead of instant or Rapid Rise yeast is okay for this recipe. Thank you!
Makes no difference. Same results for each yeast
Hi Jenny, I hope this comment finds you and your loved ones safe and well during these difficult times. I found your videos on youtube a few weeks ago while searching for a dutch baby recipe and my husband and I have been watching together ever since. We made the dutch baby. It was so tasty and fun to make. We added a bit of lemon curd w/ whipped cream for the spread then loaded it with fresh berries. Yum! Then a few days ago, we made your homemade chocolate pudding for Easter dessert. Easy and delicous! And we just made your bread for the first time ever. Wow! It was perfection! We followed your instructions to the letter and it came out perfect! It was crispy on the outside, and soft on the inside. It was, in a word, wonderful! Thank you for taking the time to make these great recipes with easy to understand instructions. Watching you is a joy! We are making homemade turkey burgers tonight so we are going to try our hands at your crusty rolls and just shape them into ‘hamburger rolls’ we hope it works! Fingers crossed! Please stay safe and well.
Hi Chrissy!
Not sure if you’ll see this in time since I’m making these in the next hour or two, but- how did the ‘hamburger buns’ work out? Any tips??
Hi Jenny
In the instructions it says let stand for 1hr? Is this suppose to read 2hrs? Just making sure. Thanks.
The instructions are correct. The rolls take 2 hours start to finish.
Gotta say, not sure about all these comments about it being amazing. I just tried this recipe and they turned out ROCK HARD and tiny. Obviously something was left out of either the ingredients or the directions!
The recipe is correct as written. Please look at the FAQs to find out what went wrong. https://www.jennycancook.com/no-knead-bread-solutions/
I am so glad to have found your recipe for these GREAT rolls! So easy and so good. Hard to believe that such a nice crust can be obtained without throwing water in the oven or spraying or anything like that. Flavor of the roll is nicely balanced; texture/chew is fabulous. Looking forward to a time when I can bake a batch of these for family gatherings! Thank you Jenny!
Keeper!
I like how this roll recipe is so easy and that it has a super crispy crust! I love having one in the morning with Cambozola cheese and a cup of coffee. It takes me back to mornings in Germany and breakfast time with dear friends.
I have used the no-knead bread for many years. I also make baguettes with this same recipe. I use the Emile Henry baguette baker. Works great. I look forward to trying this recipe right now! Thank you. I have tried making rolls with the no-knead recipe using a cast iron fry pan and Dutch oven lid. Works well, but this is much more use friendly!
How do you make the baguette? How many recipes per four loaves? DH & I made the dinner rolls this afternoon. We are blown away with the ease & success of this recipe. Please please tell me what to do to make baguettes. ThankYou in advance or your answer.
Jenny, I love your website and have tried many recipes that turned out great. I followed the directions plus my oven temp is correct for the crusty rolls. They turned out way too done and too hsrd and crisp. What do you suggest?
Wow..always felt a bit intimidated of making bread but these rolls an the no knead bread is soo easy an the bread comes out like you bought it from a bakery…I am just soo impressed an excited. Haven’t stopped making the breads an don’t buy bread from store anymore.
I never comment on recipes but OH MY GOODNESS! I absolutely had to let you know what a winner this one is! Soft, fluffy, chewy, yeasty and tender rolls surrounded by chewy, crusty, golden brown deliciousness with minimal, easy hands on time. There is no longer any reason not to have fresh, homemade rolls any time! Thank you for this recipe and the excellent instructions! I will be following you to grow my repertoire!
I can’t thank you enough for all your amazing recipes, but today I thank you for this one.
I used to be able to bake bread and never had a problem. I stopped baking for a few years because I was attempting to eat low carb.. LOL.
I hated it and I have been trying to get my bread baking groove back and I have had some really strange results, but then I remembered that I had never ever had a problem with your bread recipes and I decided to make the wonderful crusty rolls.
Nailed it! I am not straying from your recipes again, Jenny. Thank you so much for sharing all of your amazing recipes with us.
P. S. Hubby was afraid to taste the rolls because of my last disaster… His smile was all I needed to know that he loved these. Thank you ❤️
Just made for 1st time…I really love the crust…so crispy and soft onskde…I waited just couple minutes and dug in.. slathering with butter…they are really good.
I have made these rolls 4 times now. They are absolutely delicious. I am 61 years old an have made bread most of my life but nothing like these. Thank you for the recipe. Blessings to you Jenny.
Can I make the rolls bigger by cutting the dough into 6 parts instead of 8?
Sure ! just watch the time
I have reached the place where the texture of these rolls is PERFECT1 So, I am so emboldened that I am making a double batch of these rolls and adding 3 apples with cinnamon, sugar and nutmeg! I will share my outcome. I am using GRANNY SMITH apples. I will post photos of these rolls somewhere and will provide the link. I feel so confident now. I made bread over 45 years ago using red wheat that I ground myself. I did well. Now, I make this recipe in Kyrgyzstan and I am showing others how to make it. Mothers do not teach their daughters how to cook like they used to do. I am on a mission to teach young men and women to prepare their own bread. NOW, with cinnamon, sugar and nutmeg, I am emboldened. I will share my results with all of you.
Can’t wait for your results!! Did you do anything to outside? Butter, cinnamon/sugar?
How did your yummy sounding apple cinnamon rolls turn out?
I’m doing the same thing. I have a club that meets at church once a month to teach teenagers how to follow recipes (I may expand it later, some adults even want lessons). We have done bread, tortillas (flour and corn), tamales (had a guest teacher for it), enchiladas using the corn tortillas, cake, cake decorating, cream puffs and eclairs, sugar cookies, pie crust, chicken pot pie, … They may or may not use the lessons, but at least they will know how. lol
Dearest lovely lady…Please come up with a GLUTEN FREE roll recipe…quinoa or rice flour with Zanthum gum and/or/ buttermilk powder///there are so many of us who require GF flours…You can make it happen, Blessings, Beth (LOVE your views!!!)
Hi Jenny,
Lovely, lovely recipe. I have been making this recipe for several months now. I am at high altitude (7,000 ft) and I make this recipe exactly as written. These rolls turn out crusty on the outside, light and tender in the inside. So, so, good!
I am 75 years old and stirring can be difficult so I double the recipe and mix it up in my stand mixer. Sometimes, if I’m in a rush, I’ll divide the dough in two and plop it in my Wilton, non-stick, 8×4 loaf pans. After the loaves rise, I bake them for 15 mins at 425F, drop the temp to 375F and bake another 15 mins. The loaves just fall (literally) out of the pans. Wonderful for sandwiches the first day and then they make the most delicious toast or grilled cheese or panini after that.
I always freeze one loaf wrapped in foil. To reheat, place foil wrapped loaf in a cold oven, set temp to 350F and bake for 35-40 mins. Remove from oven and foil and you will swear it’s a fresh baked loaf of bread.
We haven’t bought bread at a store in years, but this particular recipe is a game changer. I no longer have to set aside an entire day to make bread, which is a miracle in itself. Add to that the fact that everyone, and I do mean EVERYONE, loves these rolls. I can’t imagine ever using any other bread/roll recipe. Why mess with perfection?
Jenny, you are a masterful, clever baker! We love watching your lighthearted videos that are filled with helpful hints, laughter and good, solid recipes. Everything I have ever baked/cooked using your recipes always turns out great. Thank you for all your ingenuity, and especially for this delicious, easy, roll and bread recipe. You-go-Girl!